Thursday, 29 January 2015

Free Motion Mavericks - Week 29 - A Third Pink Cot Quilt


My first finish of the year!

It doesn't look much different from the first or the second pink cot quilts - all those little scraps seem to be going on for ever.


Doing the swirly quilting wasn't particularly enjoyable because it was a job to see where I was going with all the busy prints, but once I had finished I was pleased with the result. 


The strawberry binding is similar to that on the second pink cot quilt , but these strawberries are bigger and pinker.


And here is the back.  I love this shade of raspberry pink.  Shame about the irregularities in the size of the quilting just below the centre, but no self-respecting baby is going to care.

This evening I made the sandwich and now have another cot quilt ready for quilting - but this time I have launched into a completely different range of colours.  For the moment I am all pinked out.


blogbutton photo peacockfmq025_zpse5bceb10.jpg


Here goes for week 29...

Many thanks to  DoraMaartje, Quilt Musings JudyHilary, LeeAnna, Quilting Reader's Garden,  and Shannyn for linking up last time.  

If you love free motion quilting, whether you are a beginner just taking the plunge, or you have reached the stage where you can do ostrich feathers with your eyes shut and still achieve perfect symmetry, then please link up.

Remember, FMQ is FMQ, whether your machine was made last week, or it is older than your granny.

Here are the very easy and slightly elastic rules:-

1.  Link up with any recent post, ideally from the last week but within the last month, which features a free motion quilting project, whether it is a work in progress or a finish.

Or, because it is still January, link up to show your favourite FMQ project finished in 2014.

2.  Link back to this post in your own post and/or grab the linky button for your blog's sidebar.
  .
3.  Visit as many of the other participants as possible and say hello in the comments box.

4.  The link up will remain open for four days, from midnight to midnight GMT for the long weekend, Friday to Monday.

So far quilters from USA, England, Wales, Australia, Canada, Germany, Holland, New Zealand and France have taken part.  The first participant from each new country will get a special mention the following week.

Welcome to Vintage Fox, the latest follower - thank you for joining!

Linking up with Kelly's blog My Quilt Infatuation for Needle and Thread Thursday
and with Sarah's blog Confessions of a Fabric Addict for Whoop Whoop Friday
and Amanda Jean's blog Crazy Mom Quilts for Finish It Up Friday


Monday, 26 January 2015

A Dress for Meg - 9 - Positioning the Buttons and Buttonholes


Finally, the last instalment showing the steps in making Meg's dress.  Here it is, finished, before I delivered it to her and she proudly tried it on for size.


The last thing to do before the hem was the buttons and buttonholes.  On this photo you can see how the gathers of the skirt are kept clear of the overlap.


To stiffen and strengthen the overlap I use a strip of calico, which fits snugly into the fold down the front edges.  The edge of the dress fabric is then folded about a quarter of an inch over the calico and machine stitched into place.


The seam attaching the skirt to the bodice has been constructed so that the raw edges are enclosed.  This gives a certain amount of bulk, which needs to be trimmed , as shown here. There are a few tacking stitches to hold the raw seam allowances together.


When the overlap is folded down and ironed the raw edges are hidden. 


The next step is to mark where the buttons are buttonholes are to be placed.  Because the buttons are five eighths of an inch wide, I have done a line of machine stitching, with the longest stitch length, five eighths of an inch from the folded edge.  This needs to be done down both sides of the dress so that both the buttons and the buttonholes are the same distance from the folded edge.


I started with the top buttonhole, placed at right angles to the edge.  To plot the position of the buttonhole, I pinned a button through one its holes so that the pin went through the line of stitching. This gave me the reference point for the buttonhole, the pin marking where the end of the inside of the buttonhole needed to be.

Then it was time to get busy with the buttonholer.


Here is the completed buttonhole on the finished dress.  The threads going through the right hand hole of the button correspond with the position of the pin in the previous photo.  


All the other buttonholes were stitched parallel to the edge.  Here is one of the buttonholes, shown before I had neatened the tail ends of thread.  The white machine stitching runs down the middle of the buttonhole. 


And here is the same buttonhole, with the white machine stitching removed and now all nicely fastened up, once the dress is completed.


Just to keep the overlap in place, after the buttonholes and buttons had all been done, I put in a few stitches by hand through the seam allowance at the bottom of the bodice.

Finally, I did the hem, gave the dress a good thorough ironing, and it was ready for Meg!

Welcome to Shannyn, the latest follower - thank you for joining! 

Linking up with Connie's blog Freemotion by the River for Linky Tuesday

Sunday, 25 January 2015

A Pretty Picture for Sunday - Frozen Puddle


For just one day this week the mud turned all nice and crunchy, complete with pretty patterns.

Welcome to Angie, the latest follower - thank you for joining!

Thursday, 22 January 2015

Free Motion Mavericks - Week 28 - A Cot Quilt In The Making


To kick start my sewing projects for the year I decided doing a cot quilt was the only way to get going.  The top was easy to put together because I had some strips already assembled, left over from previous ones.

This time I have tried to get away from my usual meandering quilting and have done swirls. Much as I love the end product, I don't really enjoy doing the quilting on these scrappy quilts because I can't see where I am going.  I thought swirls would be easier to keep track of than meanders, but now I'm not so sure.  Also, I'm not over-thrilled with the look of the swirls on the front.


If anything, they look better on the back.  And the whole thing will look better once the binding is on - it's always the way.

Enough moaning.  It's the January effect.


blogbutton photo peacockfmq025_zpse5bceb10.jpg


Here goes for week 28...

Many thanks to MaartjeHilary, GwynedJudyQuilting Reader's Garden,  Barbara, and Claire for linking up last time.  

If you love free motion quilting, whether you are a beginner just taking the plunge, or you have reached the stage where you can do ostrich feathers with your eyes shut and still achieve perfect symmetry, then please link up.

Remember, FMQ is FMQ, whether your machine was made last week, or it is older than your granny.

Here are the very easy and slightly elastic rules:-

1.  Link up with any recent post, ideally from the last week but within the last month, which features a free motion quilting project, whether it is a work in progress or a finish.

Or, because it is still January, link up to show your favourite FMQ project finished in 2014.

2.  Link back to this post in your own post and/or grab the linky button for your blog's sidebar.
  .
3.  Visit as many of the other participants as possible and say hello in the comments box.

4.  The link up will remain open for four days, from midnight to midnight GMT for the long weekend, Friday to Monday.

So far quilters from USA, England, Wales, Australia, Canada, Germany, Holland, New Zealand and France have taken part.  The first participant from each new country will get a special mention the following week.

Welcome to Marena White, the latest follower - thank you for joining!

Linking up with Kelly's blog My Quilt Infatuation for Needle and Thread Thursday
and Sarah's blog Confessions of a Fabric Addict for Whoop Whoop Friday

Sunday, 18 January 2015

A Pretty Picture for Sunday - Winter Sun


Somehow I can't quite believe how this photo came out.  Where was I?  How do you see it?

Thursday, 15 January 2015

Free Motion Mavericks - Week 27 - More Leaves


Here is the latest leaf sampler, and I have to confess I am getting a bit bored - I hope you aren't too. It hasn't got the binding on yet, but I have taken the photo with the dark green that I shall be using in the background so you can get the idea.

There is a distinct lack of inspiration here at the moment, with energy being used up in all directions except sewing.  Here is one of the reasons:-


I have been busy digging, and had to put in plenty of hours over the Christmas and New Year holidays to get my allotment in order.  I'm not complaining - in fact, after the months of misery with a frozen shoulder last year it is a minor miracle that I have managed it.


Meanwhile, domestic creativity is being channelled into cakes.  Fancy making some jam muffins? Too easy to be true.


blogbutton photo peacockfmq025_zpse5bceb10.jpg


Here goes for week 27...

Many thanks to Maartje, Hilary, Judy, Gwyned, Barbara, Janine, LeeAnnaLinda  and Quilt Musings for linking up last time.  

If you love free motion quilting, whether you are a beginner just taking the plunge, or you have reached the stage where you can do ostrich feathers with your eyes shut and still achieve perfect symmetry, then please link up.

Remember, FMQ is FMQ, whether your machine was made last week, or it is older than your granny.

Here are the very easy and slightly elastic rules:-

1.  Link up with any recent post, ideally from the last week but within the last month, which features a free motion quilting project, whether it is a work in progress or a finish.

Or, because it is still January, link up to show your favourite FMQ project finished in 2014.

2.  Link back to this post in your own post and/or grab the linky button for your blog's sidebar.
  .
3.  Visit as many of the other participants as possible and say hello in the comments box.

4.  The link up will remain open for four days, from midnight to midnight GMT for the long weekend, Friday to Monday.

So far quilters from USA, England, Wales, Australia, Canada, Germany, Holland, New Zealand and France have taken part.  The first participant from each new country will get a special mention the following week.

Linking up with Kelly's blog My Quilt Infatuation for Needle and Thread Thursday
and Sarah's blog Confessions of a Fabric Addict for Whoop Whoop Friday.

Jam Muffins


Over the New Year I had a fun-packed baking session with my great-niece (proud owner of the MP3 cosy).  She is 10, and a star baker, so I have passed on this quick and easy recipe to her.  Her younger sister and two baby brothers helped too, so it was bit of a riot in the kitchen.

The basic sponge recipe is much easier than the classic Victoria sponge, and the cakes keep better because the oil in them prevents them from drying out.  A lovely lady called Marina gave me this recipe a few years ago when we were in Northern Spain.

The great advantage of this recipe is that you don't have to weigh anything.  Marina used a little yoghurt pot as a measure, whereas I use this glass, which holds a quarter of a pint.  It would be just as easy to use a measuring jug.  The reason I have shown the ingredients in the order shown on the photos is that this way you don't need to wash the glass before you have finished.

The quantities I have given will make 12 muffins.


First, measure out three glasses of self raising flour.


Put the flower aside in a separate bowl.


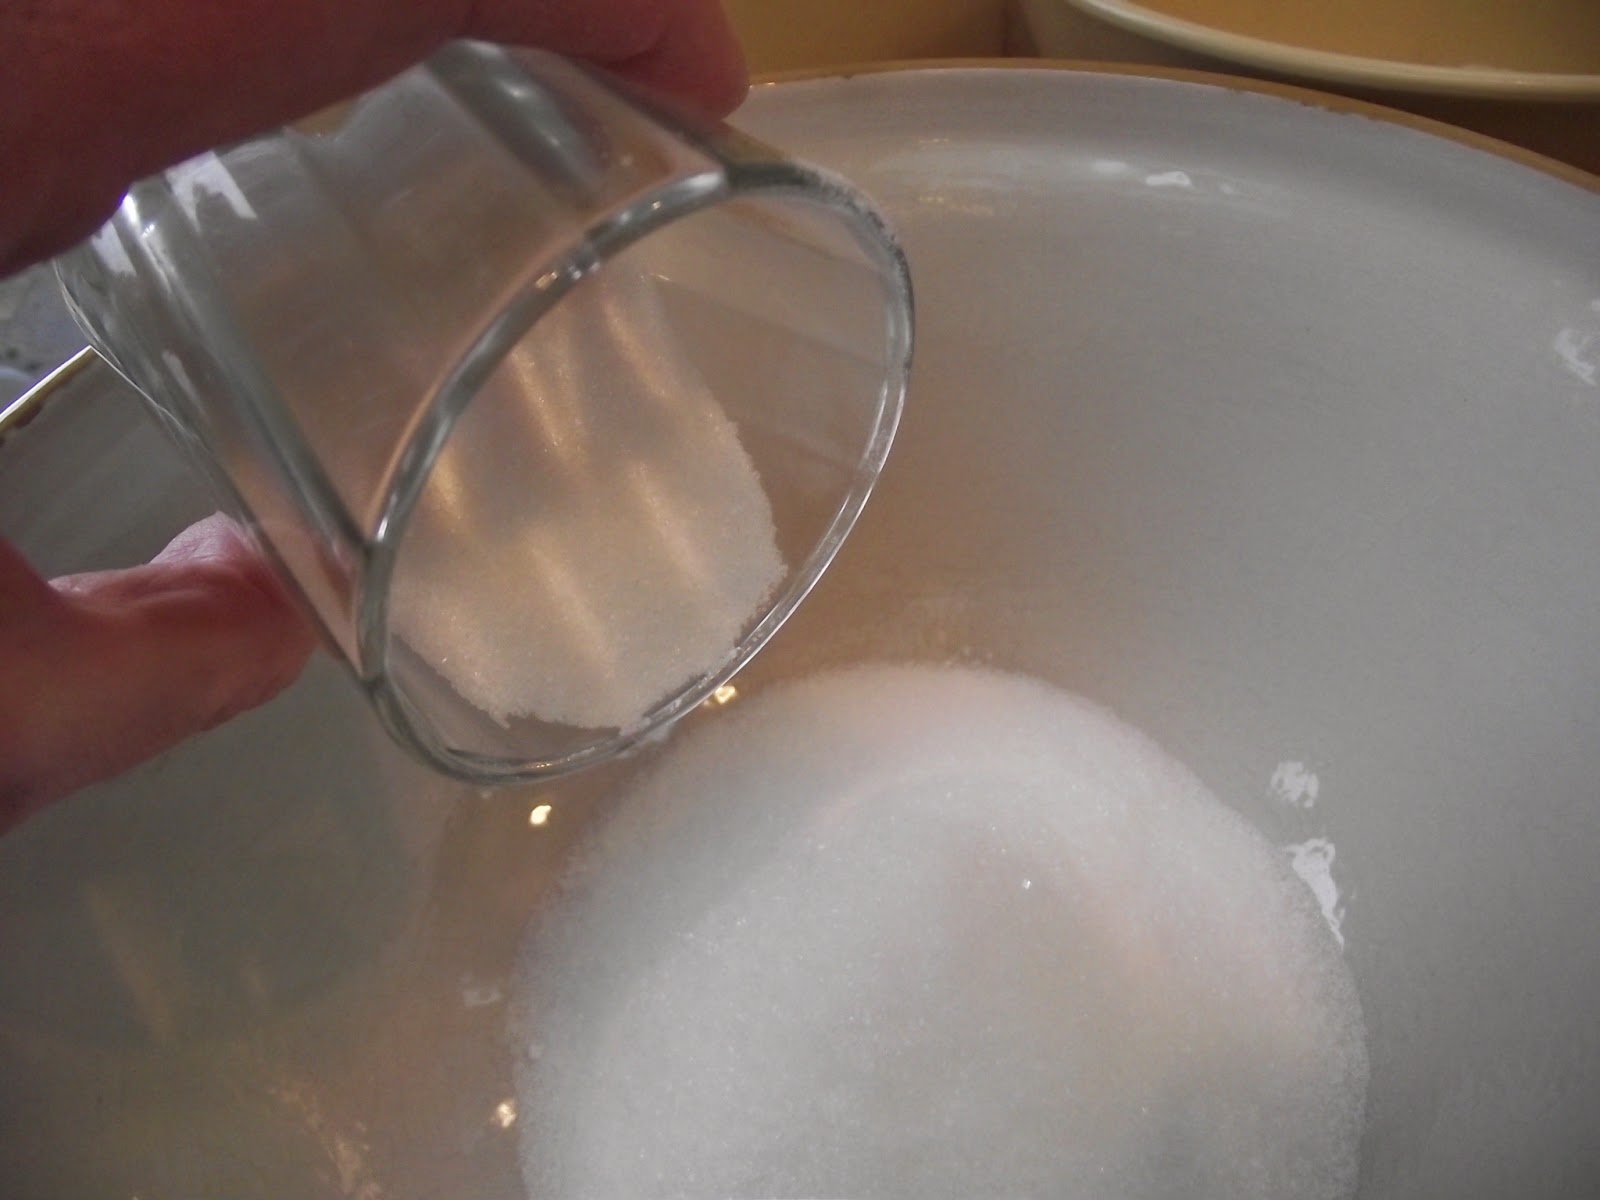
Next, you need two glasses of sugar.  Ordinary white granulated sugar is fine.


Put the sugar into a large mixing bowl.


Then add 1 measure of sunflower oil to the sugar...


... and 1 measure of full fat natural yoghurt - Greek yoghurt is ideal.  If the yoghurt has slightly separated, drain off the excess liquid.


Lastly, add three eggs.


Mix the sugar, yoghurt and eggs together.  I use a rotary hand whisk.


The mixture will end up a pale creamy colour.


The flour is then sieved and folded in with a broad knife a bit at a time...


... giving a pale thick mixture once it is all added.


Because it is a runny mixture it is impossible to spoon into the muffin cases without making an almighty mess, so I spoon it into a gravy boat first...


... and then pour it into the muffin cases.


Each case needs to be approximately two thirds full...


... then it is time to put a blob of jam, about half a teaspoonful, in the middle of each.  I have used three different colours for the muffin cases because I am using three different types of jam.  Just one more jam to go, some home-made apple and blackberry.


Once every cake has its blob of jam, cover the jam with a bit of cake mixture, and put them in a preheated oven.


Here they are, freshly baked.  My oven is a pretty fierce fan oven.  It took about 15 minutes, starting on 150, and turning the tray round halfway through cooking and turning the heat down a bit.

Another reason I love this recipe - I have never had a cake collapse in the middle, even though I open the oven door halfway through cooking.

Delicious with tea.  

Linking up with Connie's blog Freemotion by the River for Linky Tuesday

Sunday, 11 January 2015

A Pretty Picture for Sunday - Roofscape


The chimneys are fascinating - they have their own little tiled roofs.

This photo was taken from a church tower, with a fantastic view whichever way you look.

Welcome to Peggy Ryan, the latest follower - thank you for joining!

Thursday, 8 January 2015

Free Motion Mavericks - Week 26 - Happy New Year!


Happy New Year!  I hope everyone has enjoyed the Christmas and New Year holiday, and that you are all looking forward to interesting FMQ projects in 2015!

Over the holiday I did hardly any sewing, but I did do one little thread sampler with a Christmas theme.  I have to thank Marly for the inspiration - her photo of the candles on her Christmas table runner gave me the idea.

So here it is, not bound yet, a sampler of five candles, with the colours fairly close to those of the candles on an Advent wreath.


Five candles, not four.

Anyway, enough of that nonsense, it's time for the first link up of the year.


blogbutton photo peacockfmq025_zpse5bceb10.jpg


Here goes for week 26...

Many thanks to MaartjeMarly and Gwyned for linking up last time.  

If you love free motion quilting, whether you are a beginner just taking the plunge, or you have reached the stage where you can do ostrich feathers with your eyes shut and still achieve perfect symmetry, then please link up.

Remember, FMQ is FMQ, whether your machine was made last week, or it is older than your granny.

Here are the very easy and slightly elastic rules:-

1.  Link up with any recent post, ideally from the last week but within the last month, which features a free motion quilting project, whether it is a work in progress or a finish.

Or, if you prefer, link up to show your favourite FMQ project finished in 2014.

2.  Link back to this post in your own post and/or grab the linky button for your blog's sidebar.
  .
3.  Visit as many of the other participants as possible and say hello in the comments box.

4.  The link up will remain open for four days, from midnight to midnight GMT for the long weekend, Friday to Monday.

So far quilters from USA, England, Wales, Australia, Canada, Germany, Holland, New Zealand and France have taken part.  The first participant from each new country will get a special mention the following week.

Linking up with Kelly's blog My Quilt Infatuation for Needle and Thread Thursday
and Sarah's blog Confessions of a Fabric Addict for Whoop Whoop Friday.


Tuesday, 6 January 2015

The Twelfth Day of Christmas


They offered Him gifts, of gold and frankincense and myrrh.

This delightful painting of the Adoration of the Magi is on the walls of the cloister of the Collegiate Church at Alquezar, which can be seen in this photograph.

Welcome to Pam Jones, the latest follower - thank you for joining!

LinkWithin

Related Posts Plugin for WordPress, Blogger...