If you need to take off the tension discs for any reason, here's how. The photographs are of my 1897 Singer 28K.
First, unscrew the nut at the front.

Next take off the spring.

Now the thumb tab.

Now the first tension disc.

And the second.

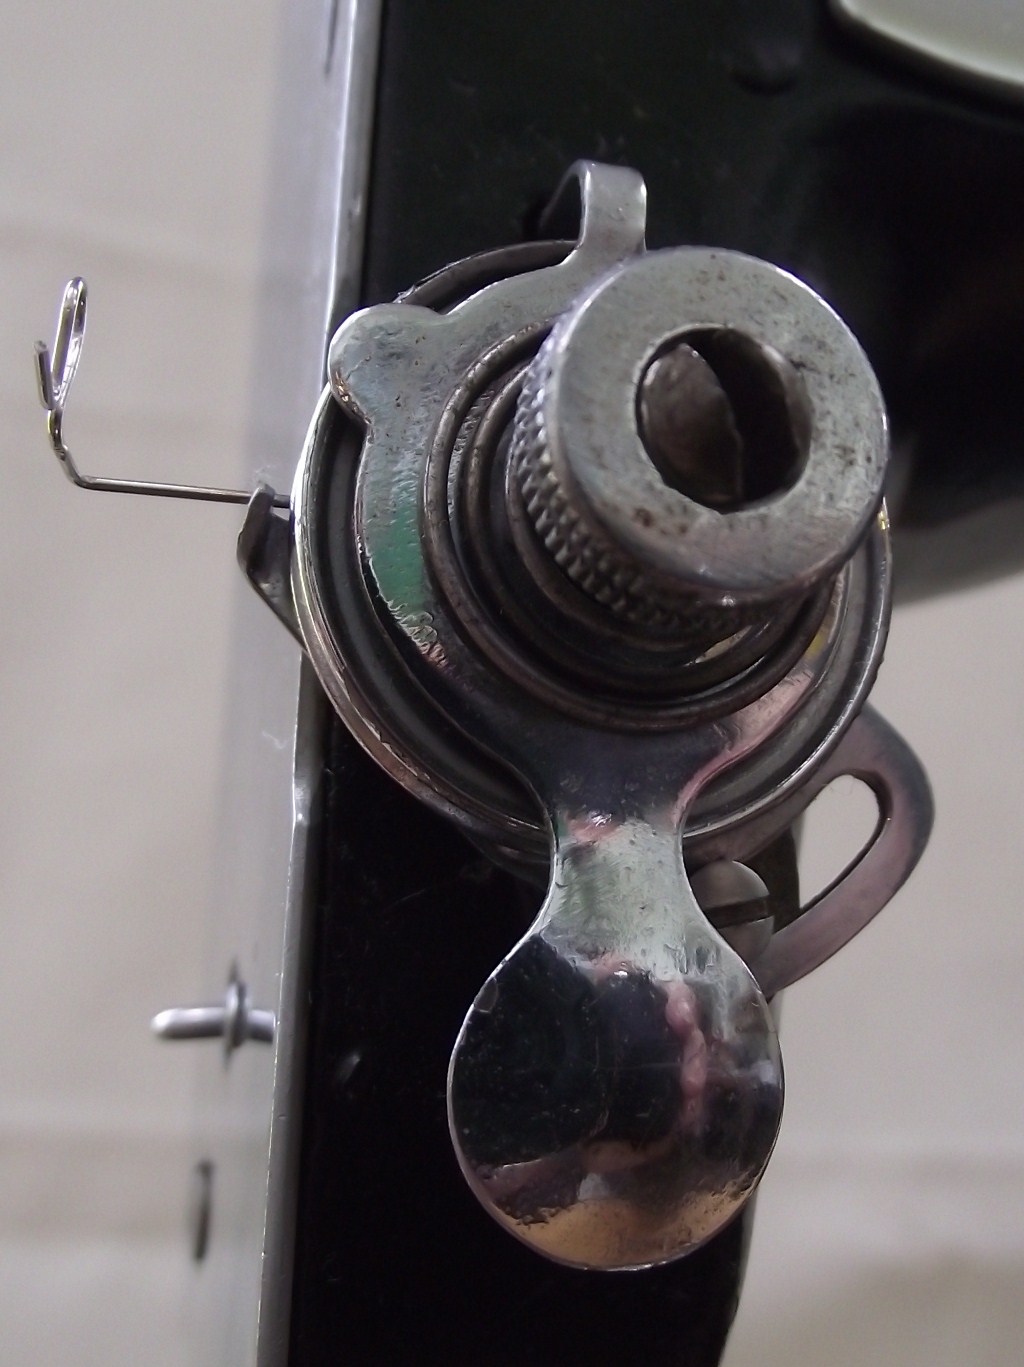
Here you can see how the tension spring is held in the correct position.

And here are all the parts ready to be put back on again, laid out in the order they were taken off, with the front-facing side facing up.
Always good to have as reference!
ReplyDeleteThanks!
Joanne
Muv, this is a very helpful tutorial. As soon as I finish my cup of coffee I am going to take my tension discs off of my 28K and see what surprises might be found lurking there. I also watched your tutorial on adjusting the tension on a long bobbin machine and will be doing the ‘drop and dangle’ test. Thank you for providing visual and written directions. They are truly a wealth of useful knowledge.
ReplyDeleteMuv, thank you for the step my step tutorial. AND the tip for pressing it to release the tension on my thread when pulling out my work. One final question. How do you get the spring to stay at that position? When I replaced my spring and tighted the center shaft, it rotates up. When I tried to leave it loose, then it would tighten anyway when I put on the final nut at the front. Wonder what I'm doing wrong? Not holding my mouth right? Have to wait for the next blue moon?
ReplyDeleteHello Allison,
DeleteDo you mean the tension spring, the wire at the left that you take the thread through?
If it keeps turning itself too high, perhaps it will stay in position if you can give it a turn clockwise all the way back round to where it should be. In other words, the spring might be uncoiled by just one turn and needs to be recoiled.
Also, if you need to re-position the little notch that it rests on, there is a degree of movement allowed if you loosen the screw that is clearly seen at the bottom of the pictures above. Tighten the screw back into place once you are satisfied the spring and notch are in the right position.
Love,
Muv
Hi
ReplyDeleteJust tried to post so not sure if it got through or not - but it was regarding replacing the tension spring - I've just had to get a new one and have seen instructions on the web showing pictures of taking the central spindle out, trapping the far end of the spring behind it and then screwing it back it - taking care to ensure the loop is in the right place as shown in Lizzie's phots - it tends to try and turn with the spindle, so you may need to take several goes at it.
My new spring has only just arrived, and have to clean the assembly first before I attempt this - gonna give it a go next week so hope it works!
Anne
Hello Anne,
DeleteI have never had to do this job - please let me know how you get on.
Muv
Hi, I have acquired a hand crank Singer 28K which is in good working condition, but I'm having difficulty getting the tension right. The shuttle tension is as tight as it will go, and the top thread tension discs are as loose as possible, but the top thread is still too tight. I wonder if you might be able to offer me some advice please?
ReplyDeleteWell Anonymous, this is quite extraordinary! I have just sorted out the same problem with one of my machines this week, and there is a blog post showing what I did scheduled for 8 o'clock tomorrow morning...
DeleteLove, Muv