Once in a while I am asked to find a machine for someone who wants one. A few weeks ago my friend Kate asked me to find a machine for her friend Claire, and put me in touch with her. It was agreed that I should look out for a Singer 99K, so after drawing a blank at local charity shops, I looked at Ebay. As always, there was plenty of overpriced rubbish. Unfortunately, many sellers think old machines are valuable just because they are old. That's not the way it works, as explained here by Helen Howes.
After going through the list on Ebay several times I decided to bid on this machine. I could tell it was the same as my 1916 99K, so would be a very similar age. The photos even showed the serial number, but the focus was slightly fuzzy, so I misread the first 5 as a 6. The machines were not quite so close in age as I initially thought.
When I checked the number on the ISMACS website, I found out it was made in the second half of 1914.
Other differences I noticed between this machine and my 1916 99K were that it has a nice bit of decoration on the handcrank...
When I checked the number on the ISMACS website, I found out it was made in the second half of 1914.
It was interesting to see that at this early stage of the First World War, the machines were not yet marked as being manufactured in Great Britain.
Other differences I noticed between this machine and my 1916 99K were that it has a nice bit of decoration on the handcrank...
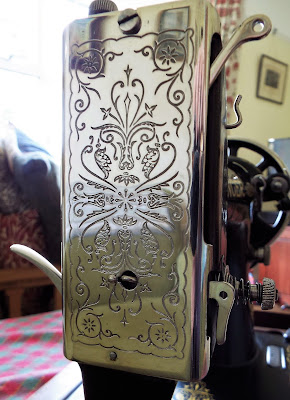
... and a more simply decorated but nonetheless beautiful faceplate. After I had polished it it was so shiny it was difficult to photograph. I had to turn the machine around to avoid too many reflections.
When I collected it, the machine was grimy and dusty and hadn't been used for years. The seller, Graham, told me that it had belonged to his grandmother, and the family had had the machine for as long as he could remember. The last person to use it was his father, some time in the 1970s, to put in a trouser zip. Despite lying idle for such a long time, it turned well, and Graham was pleased to know that I was going to get it working again.
Once I got the machine home I started work on it. I usually start by cleaning out all the dust underneath the slide plate and needle plate. Cleaning up all the metal took a couple of days, during which time I also did the trickiest job, loosening the stitch length knob. After that it was plain sailing.
I needed to send off to Helen Howes for just two parts, a new tyre for the bobbin winder...
... and a catch for the base.
Once it was cleaned and oiled, I threaded it up to test the stitch, and found it has two little quirks.
The tension spring, directly above the tension discs, lies flat against the machine, whereas ideally it should be about an eighth of an inch clear of the machine to allow for easy threading. Despite this it threaded easily, just by holding the thread against the machine and sliding it under the wire. I was glad I didn't have to try bending it outwards and risk snapping it.
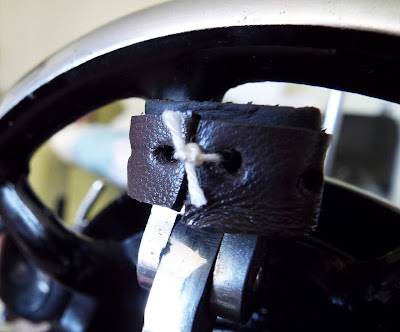
The first hook that the thread passes through is slightly angled towards the right. This means that the thread has a tendency to jump off the hook when winding the bobbin, but the problem is easily solved with one finger.
The compartment at the side of the machine was full of old odds and ends - rusty pins, blunt needles, a broken ruffler attachment, a couple of razor blades... This is what is staying in
there for Claire - three original bobbins, a seam guide (the most useful attachment ever), three old needle packets, and spare needles wrapped in the old silver paper that the razor blades probably came in.
Finally, I had to clean the case. The front was just a bit dusty.
However, when I wiped the back with a damp cloth the varnish came away because it had been reduced to powder. It had probably been too near a sunny window for too long.
In fact, the varnish had remained like a shadow underneath the handle. I gave it lashings of beeswax, which the wood readily absorbed, and which showed off the grain of the oak veneer better than on the front.
Now for my husband's contribution, the lid of the compartment. On the left is the lid from my 1916 99K. The corner is damaged, possibly by being dropped onto a hard floor. In the middle is the lid from this machine, which had worse damage to the same corner. I asked my husband to repair it, and he got as far as replacing a little piece of veneer, before he decided that it would be easier to make a new one. He found a piece of oak in his shed, cut it to size, shaped it and stained it, and put on the knob and catch from the damaged lid.
It's a perfect fit.
Yesterday Kate visited to collect the machine to pass it on to Claire. I put this machine and mine on the table side by side to see if she could work out which was which. It was like comparing non-identical but very similar twins, but she could see that this machine was cleaner, and I could tell that it turned more smoothly because it was freshly oiled.
Most important of all, it sews beautifully! Graham was happy to see it go to a good home, and Claire will have hours of pleasure getting to know her brand new 106 year old machine.


Uau! Beautiful Sewing machine
ReplyDeleteYes, it's a beauty! It cleaned up really well.
DeleteWot ho old bean!
ReplyDeleteLove
Your friend
Kate 😂🤣🏴
Afternoon old duck. xxx
DeleteSuch a lucky person to have you procure and restore this beauty!
ReplyDeleteI have several 99's, but I've never seen that face plate before. Great rescue!
ReplyDeleteThanks Cheryl! The face plate is really pretty. I have seen one once, on a sad grubby machine in a restaurant, but this is the first time I have actually worked on a machine with one. The shine is astonishing.
Delete