Showing posts with label Quick Projects. Show all posts

Thursday, 16 August 2018

Lavender Bags


My one successful crop this year has been lavender. The hot dry weather has meant that the flowers dried quite easily on a sunny windowsill, all spread out on a tray and covered with a cloth.  Then came the monumentally tedious job of removing the flowers from the stalks, which can be strong enough to poke through the weave of the material if they end up inside the bag.  The brown gingham was all I had left of a small piece of synthetic fabric.  It is definitely functional rather than pretty, but the smell is so delightful it more than makes up for the rather everyday fabric.  I am already looking forward to next year's crop.

Thursday, 8 March 2018

Free Motion Mavericks - Week 176 - Coffee Pot Cosy


Coffee isn't my cup of tea at all, so it is no surprise that making a coffee pot cosy would never have occurred to me had I not seen one when making a quick social call last week.  I realised I had all the bits and pieces at home ready for me to throw together.  

This is from the same practice pieces that I used for the camera case that I made before Christmas, but this time I have put the printed fabric on the outside.  I love the way there is a big difference in the colours, depending on which side of the coffee pot you look at - the rusty red and brown predominate on this side...


...whereas on the other side you see more of the dark blue background.


The creamy coloured buttons stood out better against the dark blue, so deciding which side to put them was easy.


The rectangle is cut to the right size to cover all the exposed glass of the coffee pot, and the  button loops pass under the handle.  Realising the kittens mug made a perfect match was a bit of added fun when it came to taking the photos.  How cute can you get?


Here it is laid out, in all its glorious simplicity.


The button loops are secured under the binding, and this glimpse of the back shows the pieced back, an offcut from a quilt backing, which is best kept hidden.


I pulled out two bits of left over binding, and this batik was the one that was long enough to go all the way round.  It wasn't until I was sewing it on that I saw  how well it went with the print, with the little brown dots echoing those in the flowers. 

And it wasn't until I enlarged the photo that I saw how bad the tension was in the quilting.  Couldn't care less.  It is a practice piece from my relatively early days of free motion quilting, and it might even have been the fault of the rogue bobbin before it started seriously playing up.

This was a super-quick project, and I am ridiculously chuffed with the end result.  It's not going to convert me to coffee, though, kittens or no kittens. 


Here goes for Week 176.

The project that caught my eye in week 175 was Lynette's Night Watch quilt.  If you haven't seen her blog post yet, nip over now and have a closer look.


If you love free motion quilting, whether you are a beginner just taking the plunge, or you have reached the stage where you can do ostrich feathers with your eyes shut and still achieve perfect symmetry, then please link up.

Remember, FMQ is FMQ, whether your machine was made last week, or it is older than your granny.

Here are the very easy and slightly elastic rules:-

1.  Link up with any recent post, ideally from the last week but within the last month, which features a free motion quilting project, whether it is a work in progress or a finish.

2.  Link back to this post in your own post.
  
3.  Visit as many of the other participants as possible and say hello in the comments box.

4.  The link up will remain open for four days, from midnight to midnight GMT for the long weekend, Friday to Monday.


Linking up with Sarah's blog Confessions of a Fabric Addict for Whoop Whoop Friday
and Amanda Jean's blog Crazy Mom Quilts for Finish It Up Friday.

Saturday, 3 March 2018

A Quick Project


Scraps of binding, a practice piece from when I was first learning free motion quilting, and a conveniently cylindrical coffee pot all add up to a very quick project for a dull afternoon.

While on a visit this week I spotted a coffee pot just like this one with its own wrap-around cosy, and knew I just had to make one, especially as I had all the components already prepared and stashed away waiting for the right project.  We have two of these coffee pots, a small one and a large one.  I am not a coffee drinker, but my husband uses the smaller pot every day to make himself a solo cup.  I said I was going to make a cosy, and the conversation went something like this:-

"What for?"
"To keep your coffee hot."
"But I want it to cool down."
"I want to make one."
"Why?"
"To use up the bits and pieces."
"It's not worth the effort."
"Yes it is."

Etc. etc. etc.  I suppose I should have realised he wouldn't totally see the point, because I am the one who insists on hot tea, scalding soup, hot dinner plates, and can finish a meal while he is still waiting for his to cool down.  Anyway, we came to an agreement.  I shall make one for the larger pot so we can keep coffee warm when we have visitors.

I am looking forward to a super quick finish!

Friday, 15 December 2017

Free Motion Mavericks - Week 166 - Camera Case


Easy as pie - why did it take me so long to get round to making this?  Probably because I was thinking I needed to make a specially shaped case for my camera, whereas a simple pouch does just as well.  


The quilting shows up really well, which I am pleased about...


...and on the inside the print fabric makes a surprise appearance every time.  I have never been sure whether I like the colours of the print, but I love the pattern and it worked a treat as a guide for the quilting. 

As for the brown with cream flowers, that is probably one of the ugliest fabrics I have ever allowed in the house, yet somehow it works as the binding. 

And while I'm having a good moan, the green reminds me of the PE knickers we wore at primary school.  In my mind's eye I am transported back to being eight again, when doorways were bigger.

It's surprising how many unpromising elements can be brought together and work well.


Here goes for Week 166.

The project that caught my eye in Week 165 was Kerry's Provence quilt.  If you haven't seen her Flickr page yet, nip over now and have a closer look.


If you love free motion quilting, whether you are a beginner just taking the plunge, or you have reached the stage where you can do ostrich feathers with your eyes shut and still achieve perfect symmetry, then please link up.


Remember, FMQ is FMQ, whether your machine was made last week, or it is older than your granny.

Here are the very easy and slightly elastic rules:-

1.  Link up with any recent post, ideally from the last week but within the last month, which features a free motion quilting project, whether it is a work in progress or a finish.

2.  Link back to this post in your own post and/or grab the linky button for your blog's sidebar.
  
3.  Visit as many of the other participants as possible and say hello in the comments box.

4.  The link up will remain open for four days, from midnight to midnight GMT for the long weekend, Friday to Monday.


So far quilters from the USA, England, Wales, Australia, Canada, Germany, Holland, New Zealand, France, Macau, Russia, Ireland and Brazil have taken part.  The first participant from each new country will get a special mention the following week.


Linking up with Sarah's blog Confessions of a Fabric Addict for Whoop Whoop Friday
and Amanda Jean's blog Crazy Mom Quilts for Finish It Up Friday.

Thursday, 30 January 2014

An MP3 Cosy for my Great-Niece


The tiny scraps that I sorted out earlier this week have been transformed into a handy little cosy for my great-niece to put her MP3 in.  The mobile phone cosy with a button that I made last year I gave to my sister in law, and her granddaughter, aka my great-niece, loves it and wanted one for her MP3.  

So here it is, ready to be put in an envelope and posted off to Surrey.  I will have to write a grovelling note of apology because she particularly wanted me to include the teapots fabric used in her grandmother's cosy, and I clean forgot... something along the lines of "terribly sorry darling, I am a great aunt after all, more ancient and forgetful by the minute, especially when caught up in a creative whirl... "  should fit the bill.


Here is the back, and especially for Esther ipatchandquilt, who thought it was a bit of a lark having a post just featuring a picture of scraps, giving them the movie star treatment, I have stood the cosy on its own little red carpet.


And here it is opened out, so you can admire the naff brown striped lining in all its 1970s glory.

To compensate for me forgetting the teapots fabric, I hope my great niece enjoys a game of spot the fabric next time she visits her grandparents and sees this quilt.  In the quilt she will find the pinky purple flowers at the bottom of the second picture, and the green floral and brown floral on the third picture, which all belonged to her great grandmother, and which she bought in the USA.

A very satisfying little project, making something useful with tiny scraps.  In fact, the strip that I used for the button loop was already chucked into the rubbish box on my table, and I suddenly thought better of it and fished it out.  I am so glad I did.  With the blue button it clashes so fascinatingly horribly with the green.

Linking up today with Kelly's blog My Quilt Infatuation for Needle and Thread Thursday.

Tuesday, 12 November 2013

Making a Dress for Dress-a-Girl - Stage 2


The straps are on...


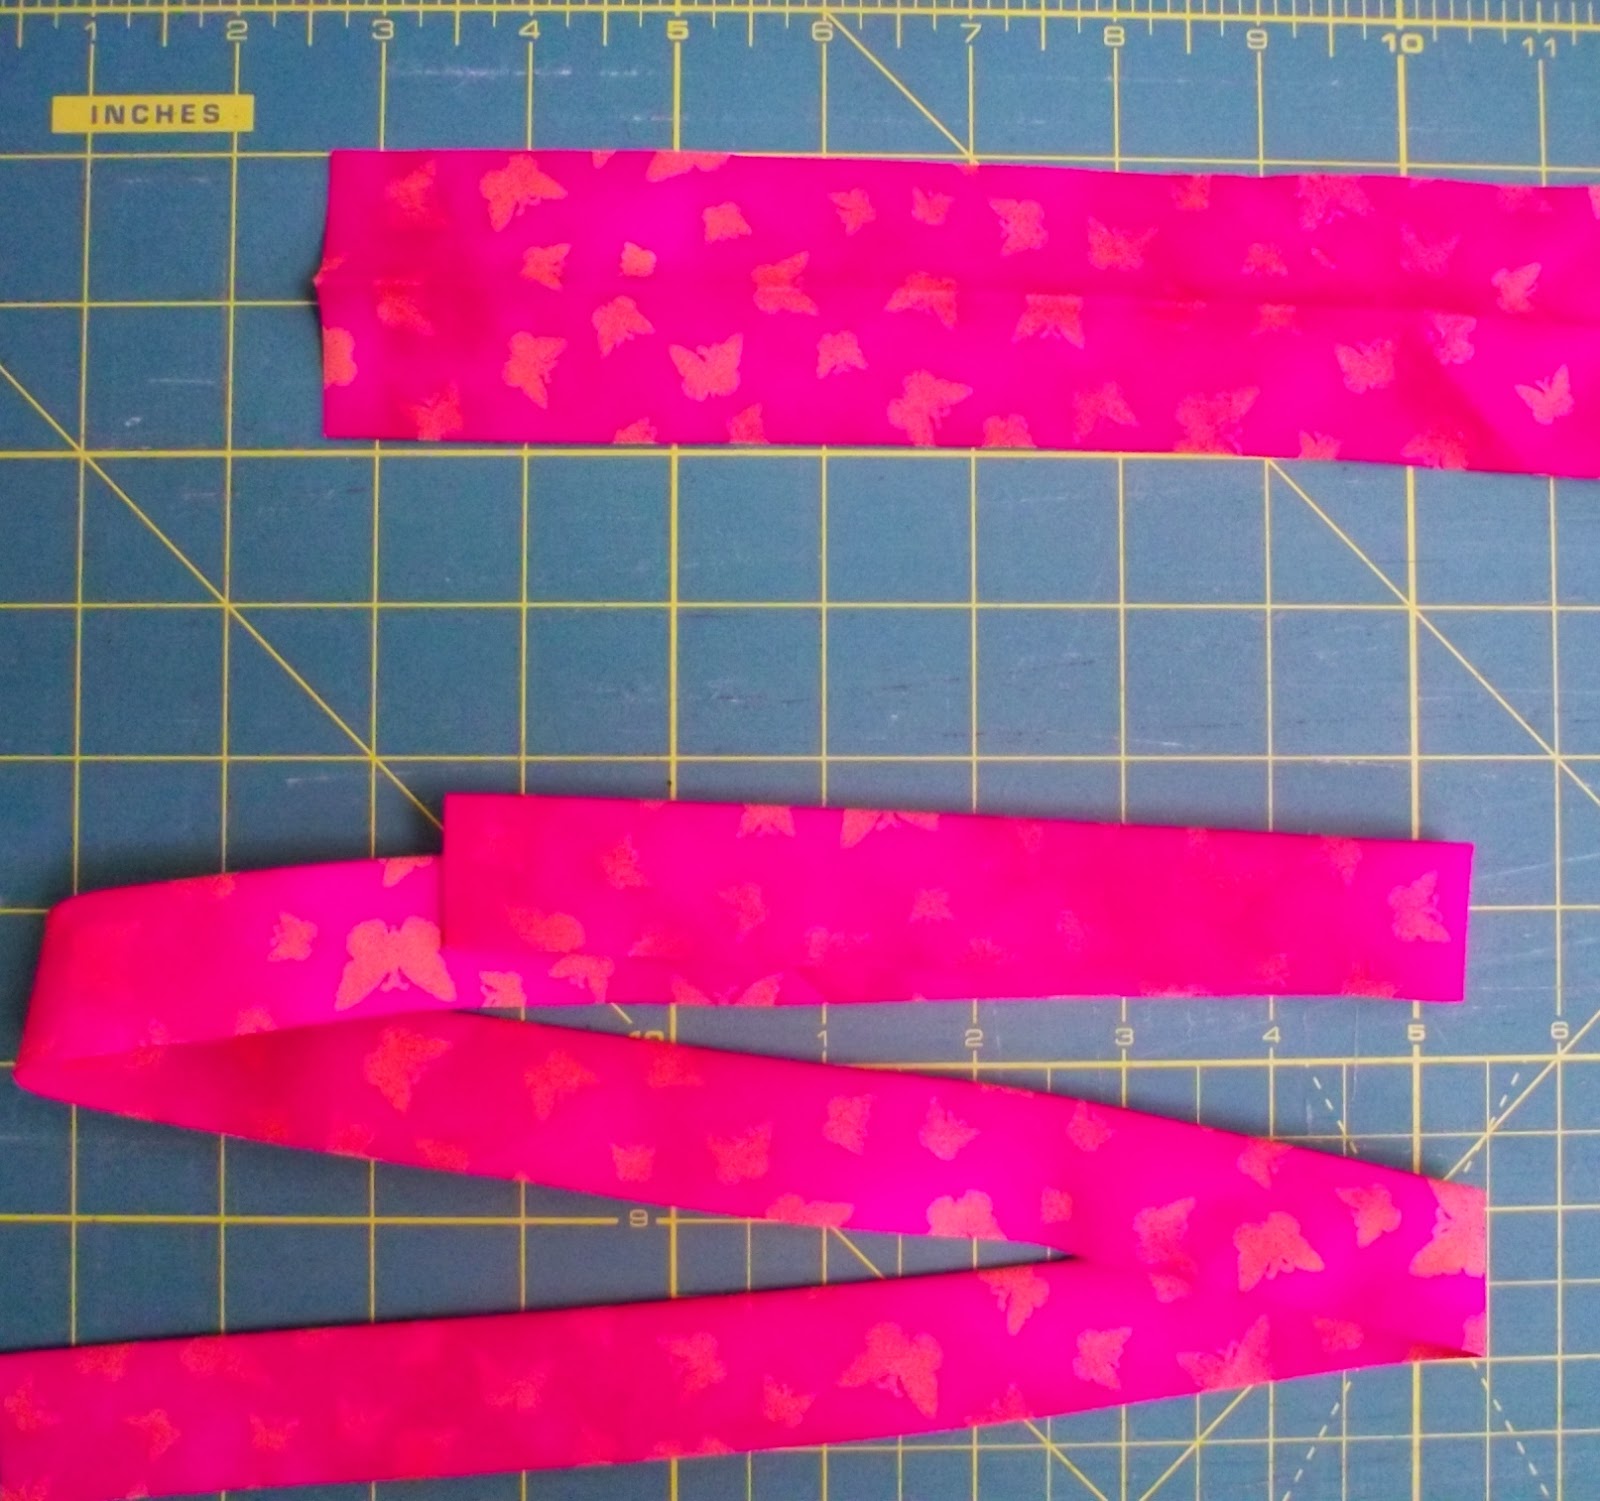
... they are made from bias cut strips, each 36 inches long.  I could have used broad bias binding, but I hadn't got any, so I had to cut my own strips.  Each strip is 2 inches wide and folded in half, a double thickness binding.  I could have cut them a bit broader, to measure say an inch and a half when folded, but any narrower than an inch would have been too fiddly.


The middle point of the strip needs to be lined up with the side seam,  and I attached it to the inside of the dress on the underarm edge, with about a quarter of an inch seam allowance.


The side seam was pressed towards the back.


Then it was time to rethread the machine with thread to match the binding, and fold the binding over for the second line of stitching.  Where the binding extends beyond the seam to form the shoulder strap, it is best to iron the fold down the centre of the strap before doing the stitching.


The second line of stitching is worked on the outside of the dress...


...and continues on along the edge of the strap.


Because the strap is cut on the bias, it can have a tendency to twist if it only has one line of stitching.  For this reason I do a line of stitching along the folded edge also, and stitch across the end to prevent the raw edges fraying.

So all the dress needs now is a narrow hem around the bottom,


and it's finished.

Let's hope that somewhere in the world a little girl will be thrilled to wear it!

Monday, 11 November 2013

Making a Dress for Dress-a-Girl - Stage 1


This time last year I had a great time at Cordial and Grace making dresses the charity Dress A Girl. This Friday it's all happening again.

Today I started a dress so I can post some instructions.  This is the pattern I have used, which I have adapted from the pattern that can be printed off at LBG Studio.  What I have done is added a bit of flare, and a curve to the hem, so the dress isn't so straight and a little girl can have more room for running.


Here are the dimensions for the top part of the pattern. 


And here is the lower part of the pattern, showing the curve at the bottom edge.


And here are the measurements of the two vertical lines.


The pattern is placed on the fold of the material, and two pieces need to be cut out.  The front and back of the dress are identical.


The first step was the two side seams.  These need to be French seams, totally enclosing the raw edges and giving a hard wearing seam.


The seams need to be sewn from the top, the underarm, to the hem.  If the pieces are not an exact match, then they can be cut and evened off at the hem edge.


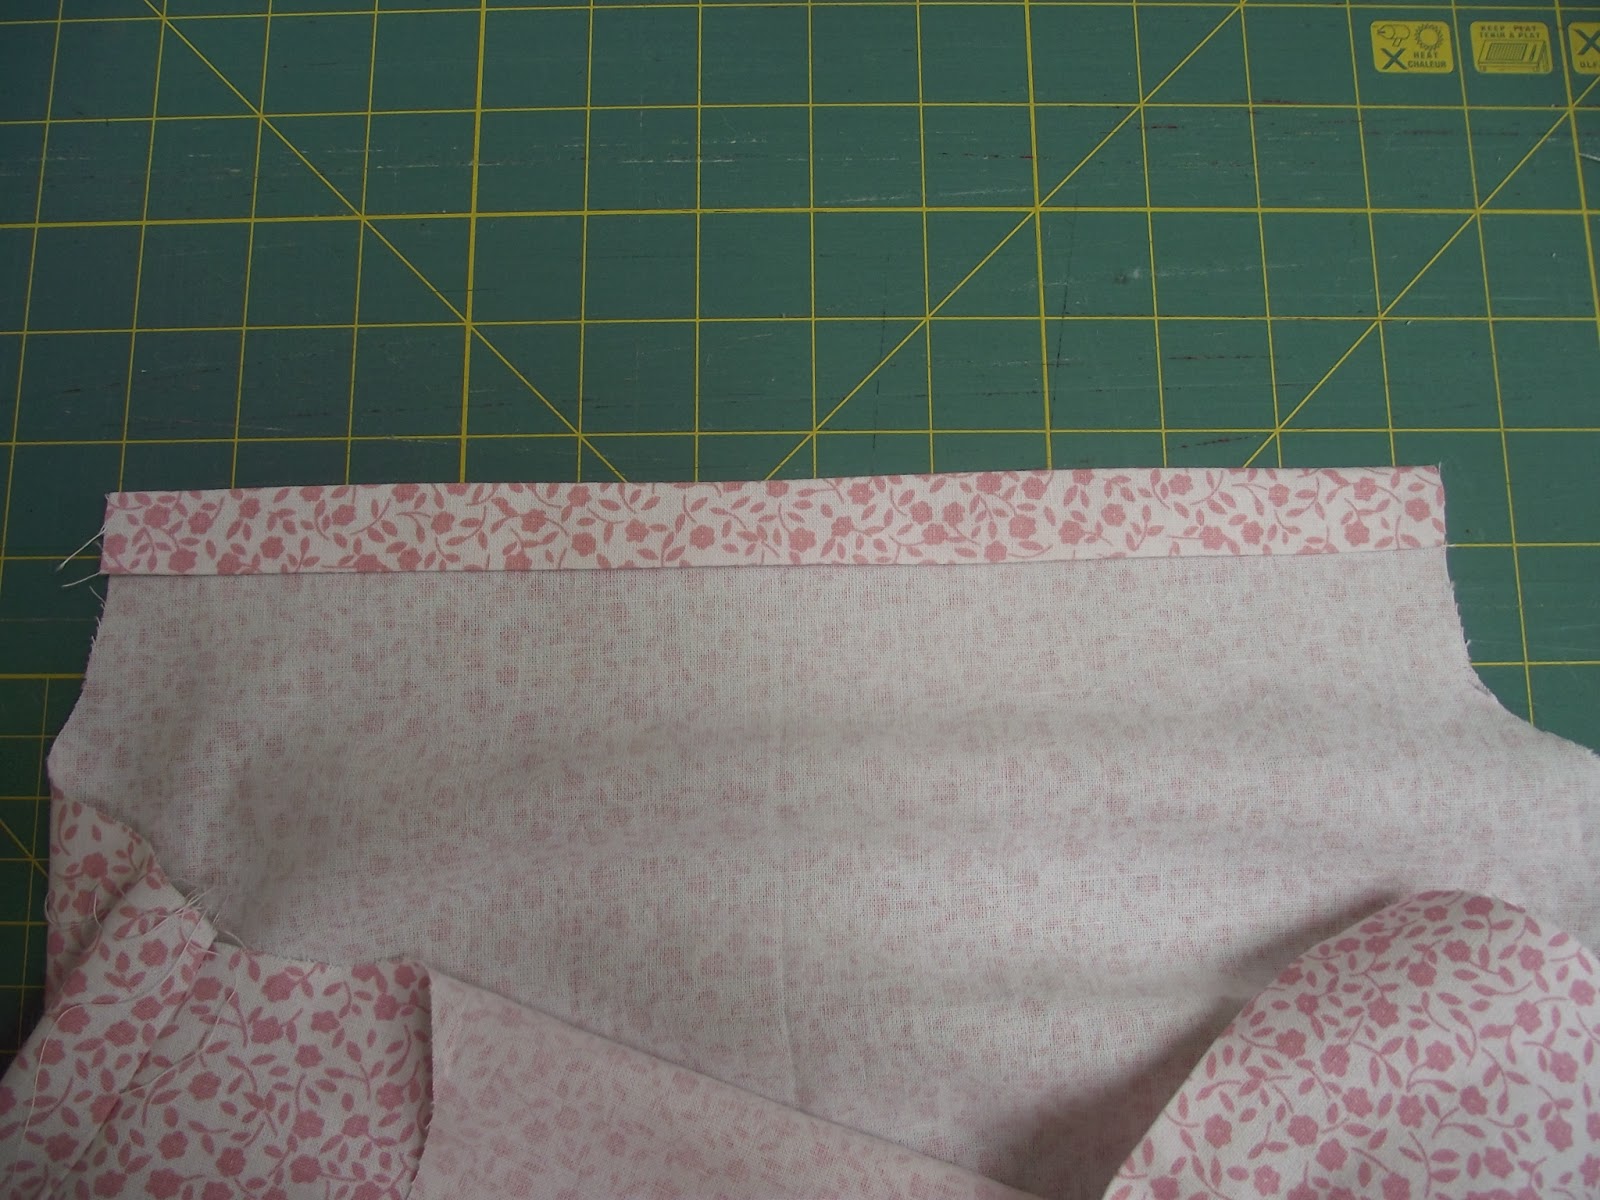
The next bit to do is the top edges, which will have elastic inserted.  First fold over and iron down just under a quarter of an inch.


Then fold over again to give a turning of three quarters of an inch.


The turning is then stitched down by machine, and I like to add an extra line of machining about an eighth of an inch from the folded edge.


Next, cut two lengths of elastic, each six inches long, and put a small safety pin at one end.


Insert the elastic, feeding the safety pin through the turning, until the end of the elastic is level with the edge of the turning.  Machine stitch it in place.  I always do three lines of stitching to be sure - elastic can fray and pull itself off the stitches if there is only a single line close to the end.
  

Now the fun starts at the other end.  This is how to prevent the elastic pinging back and losing itself inside the turning.  Pull the safety pin until the end of the elastic is level with the end of the turning, and hold the elastic in place with a large pin.


Now secure the elastic again with a safety pin.  This means the first safety pin and the straight pin can be taken out, and the elastic stitched in place in the same way as the other end.


This is how the elasticated top edge looks when finished.

That's all for today!  Tomorrow the shoulder straps will go on...

Welcome to Barbara, the latest follower - thank you for joining!

Wednesday, 9 October 2013

Making a Sewing Machine Cover - Stage 4


The final stage - putting on the binding.  Once the lining was inside the outer shell of the cover I secured the two layers together with a line of stitching about an eighth of an inch from the edge.


Because the outer shell is a fraction bigger than the lining, I used large hand sewn running stitches to gather in the slight fullness before doing the machine stitching at the edge. Fortunately there was very little discrepancy in size between the two layers - had I needed to I would have done an extra line of machining, as I did with the tea cosy.


After that it was an easy job putting on the binding.  The African print had a narrow border, and there was enough for me to use as the binding with only an inch and a half to spare.  
Exceedingly jammy.


Here is the completed cover with the Singer 201K treadle hiding underneath.  I am actually going to use it on the 15K treadle, but the 201K treadle had to stand in to do the modelling job because the 15K is surrounded by sewing room chaos.


And this photo is of the 15K hand machine hiding underneath - entirely appropriate because this is the machine that did all the work on the cover except for the free motion quilting. Because I used the dimensions of the bentwood cover of this machine for the measurements when cutting the panels, the cover fits snugly around the base.

Welcome to Kelly Hughes, the latest follower - thank you for joining!

Even though it is Wednesday, this post is being linked up to Show and Tell Tuesday - lots more projects to see there...

Tuesday, 8 October 2013

Making a Sewing Machine Cover - Stage 3


The lining is now made.  I have used a stiff thermal curtain lining, which is fluffy on one side. I cut one large piece, 21 and a half by 24 inches, and two side panels.  The side panels started as rectangles measuring 8 and a half by 10 and a quarter inches, and I used the same 8 inch plate for rounding off the top corners.


Here is the completed lining, standing up all by itself and showing the fluffy side.  The seam is stitched smooth sides together with a quarter inch seam allowance.  This material does not fray, and these raw edges will be hidden between the two layers of the finished cover.

Let's see if I can have the binding on by tomorrow...  

Monday, 7 October 2013

Making a Sewing Machine Cover - Stage 2


Today I have been working on the machine cover, using the free motion pieces that I had made in advance.  The cover will be for my Singer 15K treadle.  I have used the dimensions of the bentwood cover of the 15K hand machine as a guide.

First I cut a large panel, 21 and three quarters by 25 and a quarter inches.  Then I cut the two side panels, 10 and a half by 8 and three quarters.  On the photo I have shown the two side panels opposite ways up - the density of the quilting only really shows up on the back.


Next, to get the curve at the top corners of the side panel, I cut around the edge of an 8 inch plate.

Here is one of the side panels with the top corners rounded off.


The side panels were then sewn onto the large panel, using a three eighths of an inch seam allowance.  Here is the cover, inside out.  Already it can stand up on its own.


To help the cover keep its shape, the seam allowances need to be sewn down by machine - exactly the same method as I used for the tea cosy.  I worked from the right side...


... and this is what it looks like on the inside.


Here is the outer shell of the cover completed.  It will stand up more firmly once the lining is put in. That is tomorrow's job.

Welcome to Ria Vogelzang, the latest follower - thank you for joining!

Linking up to Connie's blog Freemotion by the River for Linky Tuesday - lots of bogs to visit there!

LinkWithin

Related Posts Plugin for WordPress, Blogger...