Sunday, 26 May 2019
Slipping Stitches for Neat Edges
All keen knitters have their preferred way of sewing up the seams. This is the method I shall be recommending in the pattern I shall be posting soon.
Fisherman's rib, because it gives a slightly compressed effect, needing more rows per inch than stocking stitch, calls for slipped stitches at the beginning of each row.
The little cardigans I have been making have all involved playing with colour, alternating two-row stripes, so these instructions include showing how to change yarn from one colour to the other.
In brief, the last stitch of every row is a knit stitch, and the first stitch of every row is slipped knitwise.
This is the back of the work, and the row where I change colour, in this case from orange to green.
First, insert the needle as if to knit the first stitch.
However, the stitch isn't worked, it is just slipped onto the right hand needle.
The orange yarn is taken round to the back of the stitch, and brought round to the front between the needles, and held in place to the left.
Then the green yarn is picked up to work the next stitch, which is a purl...
… and the rest of the row is worked in green. This is a knit one, purl one row, with the last stitch being a knit.
On the next row, slip the first stitch, and keep the yarn at the back of the work ready to knit the next stitch.
This row is the row where the purl stitches are slipped and the yarn carried over the needle. The last two stitches of the row are both knit stitches.
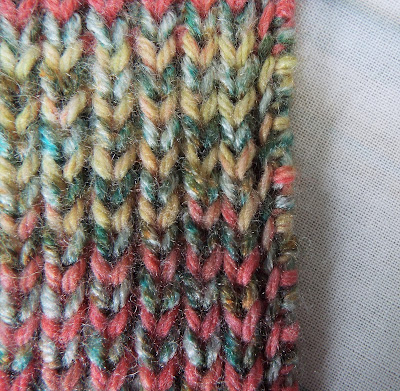
This is the edge of the work, seen from the back. Just inside the edge you can see the two-colour rope effect where the yarns are overlapped (as in the third picture) when changing colour. Also, the actual edge is consistent with the compressed tension of the fisherman's rib, making it easy to sew the seams and pick up stitches for the button band.
xxx
Labels:
Knitting,
Knitting stitches
Subscribe to:
Post Comments (Atom)


No comments:
Post a Comment