
Using the Willcox and Gibbs Automatic is an absolute delight. However, I use it so seldom that I have to check the manual every time I need to thread it. This is how it's done.
First, take the spool pin off, and put on the thread so that it unwinds to the front left.

When the spool pin is back on the machine, the thread winds away towards the back.

Next, find the hole in the bar at the front of the machine - on mine it is right in the middle of the G of Gibbs. Turn the wheel to raise the needle to its highest position...

… and this aligns the two metal staples behind the hole into position...

… so that the thread can pass through, from the back towards the front.

The next stage is round this interesting little mechanism, referred to in the manual as the automatic tension. The metal cap at the top bobs up and down with the motion of the machine, so the needle should remain in the raised position while threading so that there is a clearly visible groove just below the cap.

The thread is then laid in this groove from the left, going in a clockwise direction to come out at the front.

The thread then goes to the centre back of the machine, and through the hole in the little metal pillar...

… and carries on to the left and underneath this metal staple...

...then up, under this little bridge...

… then down through this hole in a little bar sticking out at the side...

… then straight down to the needle, which is threaded from left to right.

Now let's try out the stitch.

On the top it has the appearance of an ordinary straight lock stitch, but it is a single thread chain stitch. To stop the chain stitch unravelling, the work has to be removed in a certain way.

First, pull the thread on the left hand side of the needle to give a few inches' slack.

Then pull the slack through to the right hand side of the needle, and cut the thread leaving a tail of about 4 inches, and leaving the needle threaded.

Then raise the foot and pull the work away gently in a south westerly direction. The tail end is pulled through the machine and forms the last stitch...
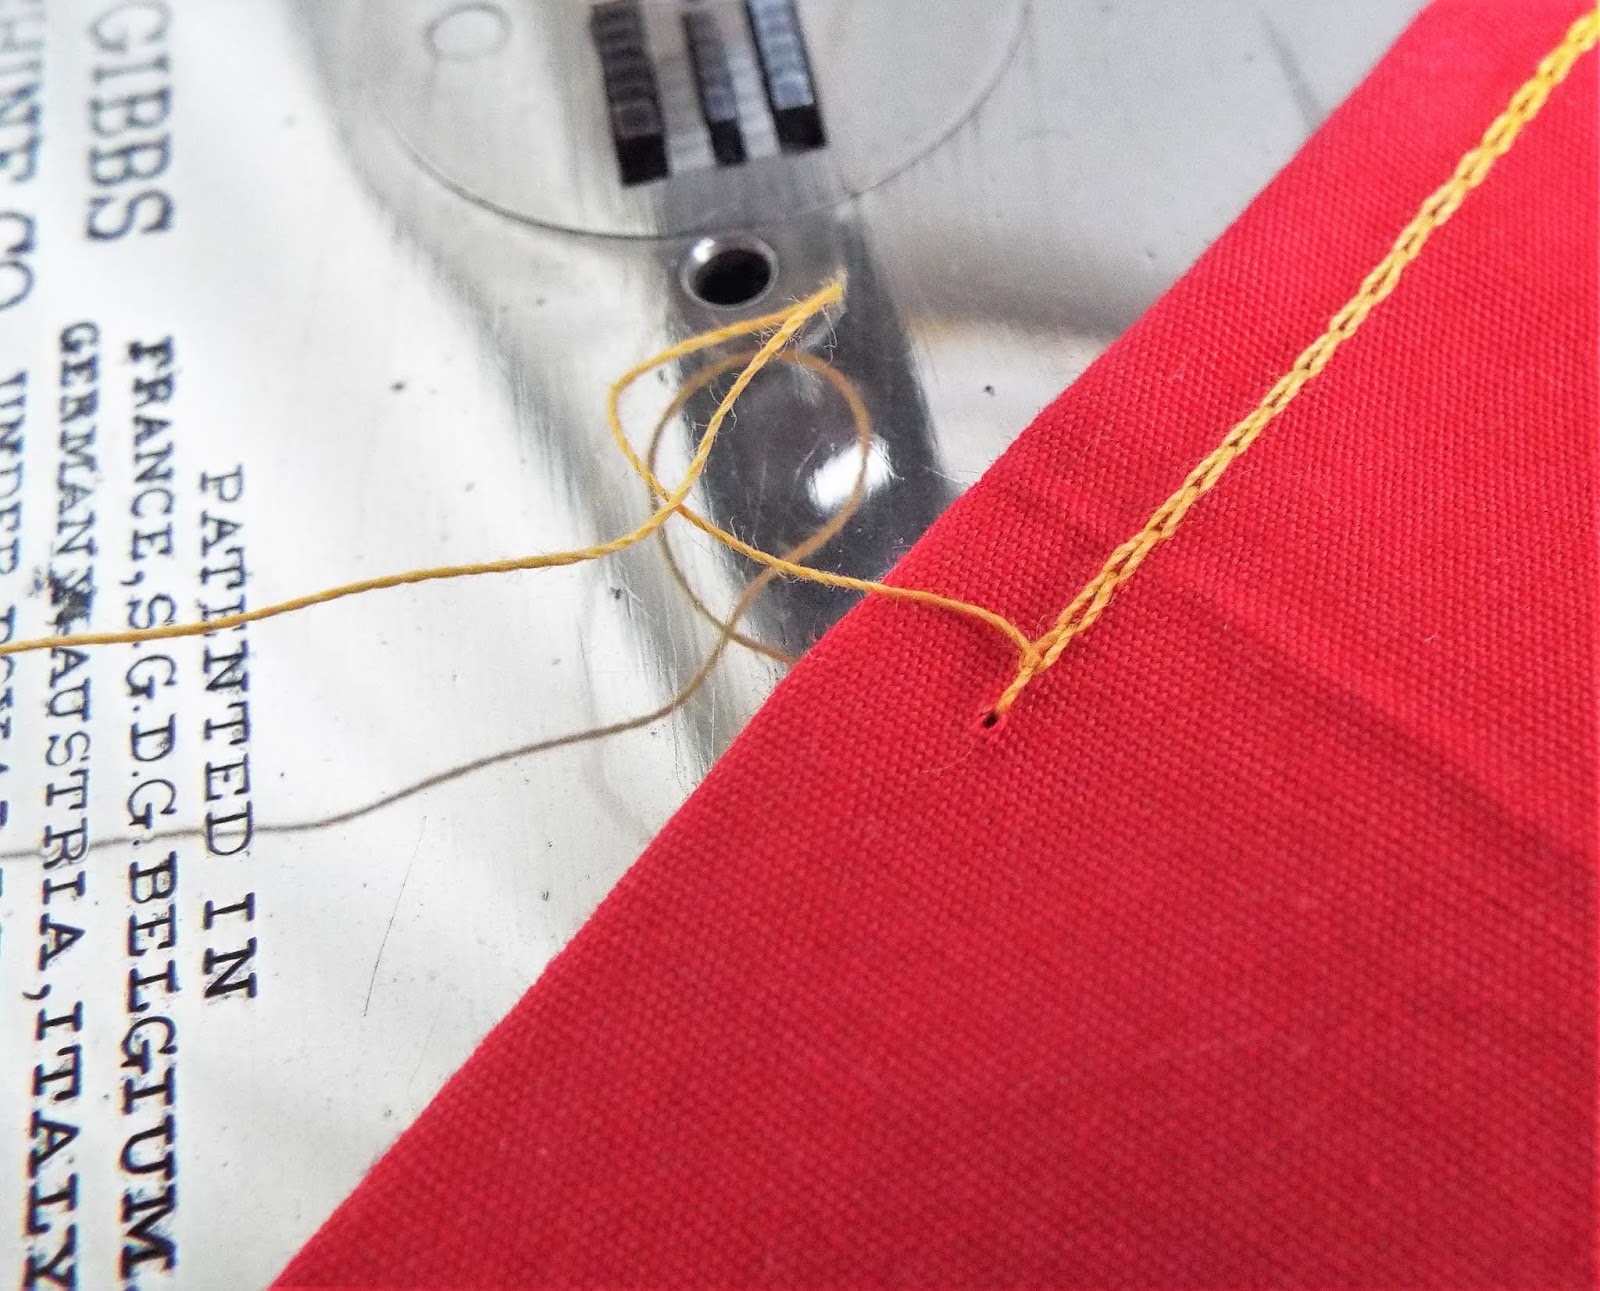
… and ends up securely pulled through the previous stitch so it won't unravel.
Total genius.

Wow! Amazing how they thought up how to do this to have the thread feed smoothly. Lucky you to have the opportunity to keep it working. Old machines are the best!
ReplyDeleteAgreed, old machines rule, and this is my oldest!
DeleteThat's a beautiful machine and such lovely stitching.
ReplyDeleteReally pretty stitching - I should think up some projects to make more use of it.
DeleteThe W&G are fun machines. Each time I use one of mine, I have to pull out the manual. I have a couple W&G treadles and an American and British hand crank, but prefer the british hand crank.
ReplyDeleteLucky you, having a selection of W&Gs to choose from! I would love to try out a W&G treadle one day.
DeleteExcellent tutorial! Thanks. I printed this out to put with my Willcox & Gibbs.
ReplyDeleteGosh Cheryl, that's a lot of printing! So glad you have found it useful.
DeleteA life saver thanks I have just had this working after my mum died over 20 years ago ( I found the machine in an old property I had and gave it to her) . I remember her saying it was like a Rolls Royce compared to new machines she treasured it !!
ReplyDeleteOh excellent! So glad you can use the machine again. It will be a nice way to remember your mum.
DeleteLove, Muv