Showing posts with label Bobbin winders. Show all posts
Wednesday, June 12, 2013
German Bobbin Winders - No. 4 - Naumann Vibrating Shuttle
Using the bobbin winder on the Naumann Vibrating Shuttle is refreshingly simple.
First, take the thread though the wire hook and little tension discs to the right of the spool pin.
Then take it down to the bobbin winder, trap the thread with the end of the bobbin at the right hand side, and pass the thread through the hole at the top of the little bar on the winder.
There is a lever at the bottom of the bobbin winder. Push the lever up, and the winder will engage into position against the balance wheel.
Now fill the bobbin.
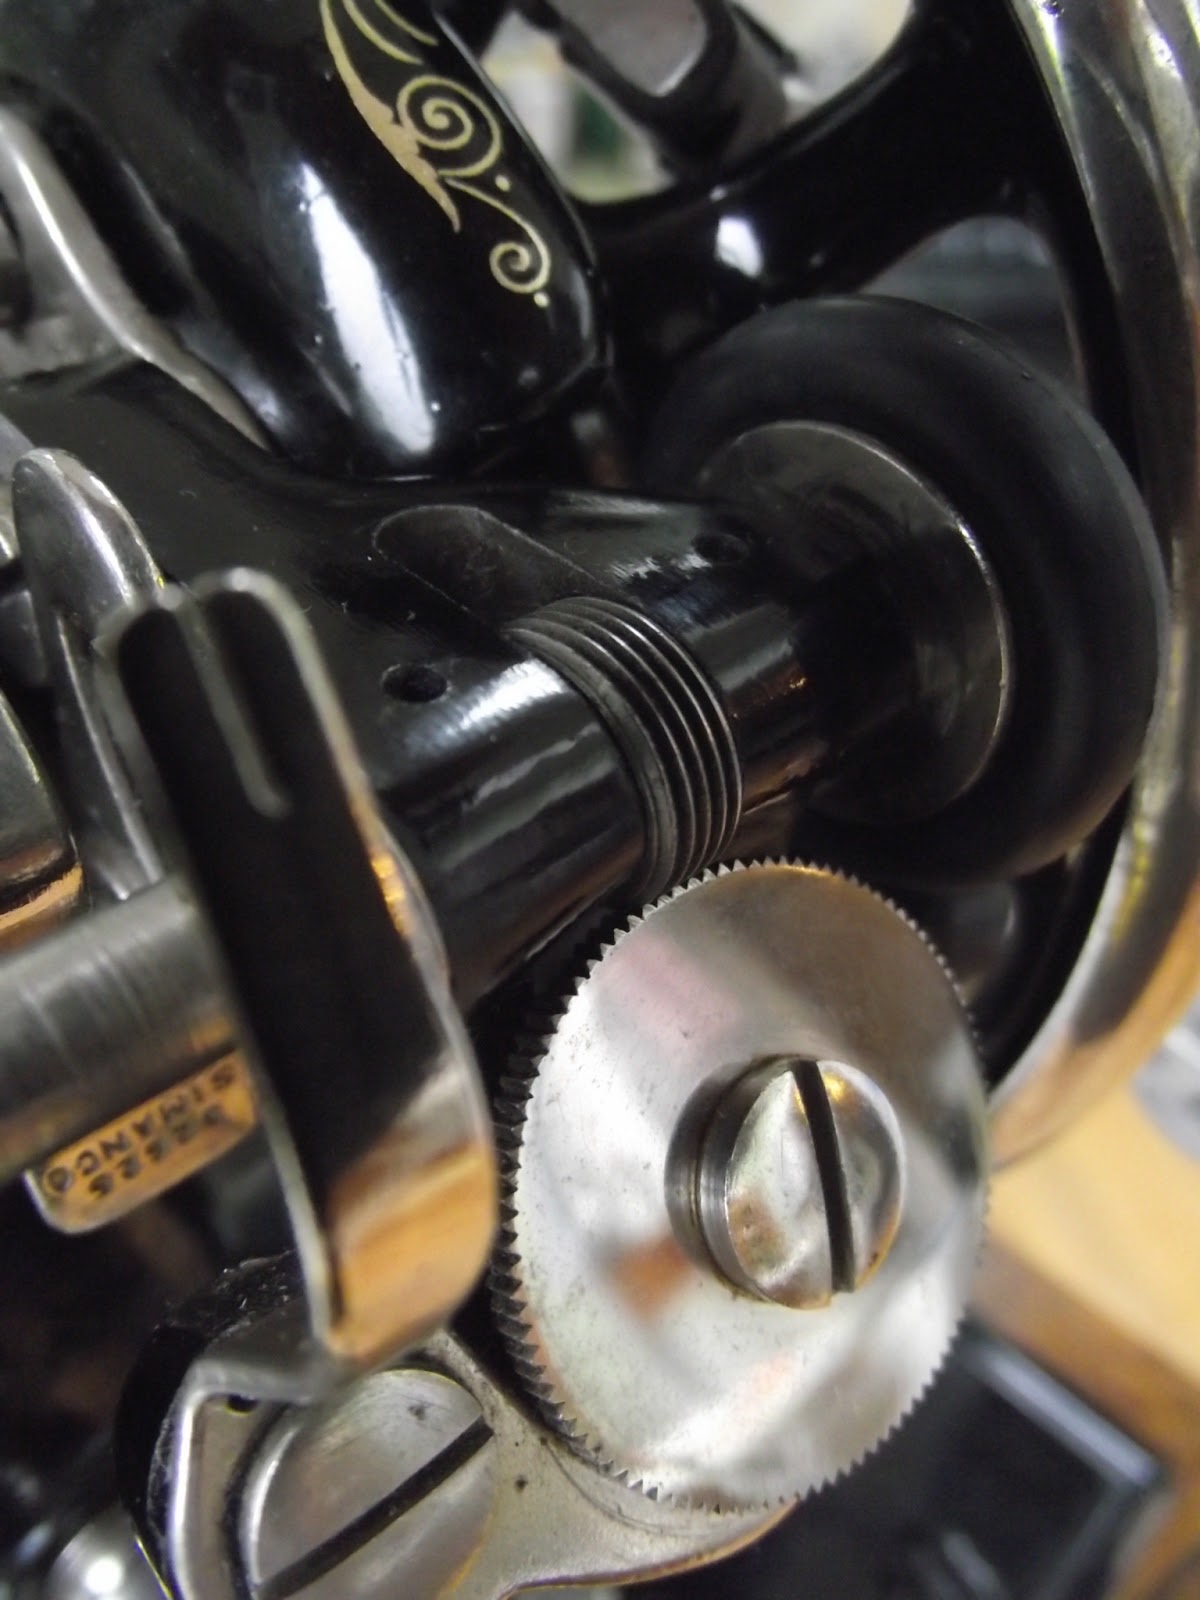
To disengage the bobbin winder, push down gently on the metal plate that rests against the bobbin. This is an automatic release mechanism, which will automatically release the winder once the bobbin is full, so there is no chance of overfilling a bobbin.
The bobbin can now be taken out. Job done!
Thursday, May 30, 2013
German Bobbin Winders - No. 3
This is my Serata Vibrating Shuttle hand machine, the twin of my treadle. Unfortunately it had already lost its original case and base before I bought it, so it lives in an old Singer base. A shame really.
The bobbin winder is wonderfully efficient and easy to use. This is how it works:-
First the thread goes through the hook at the top of the faceplate. There is a little wire thread guide next to it, possibly originally intended to take the thread to the bobbin winder if you were winding a bobbin and sewing at the same time. However the thread has a tendency to jump out of the wire thread guide so I don't use it.
Next, the thread goes over to the little tension discs at the top of the upright bar above the winder. It needs to go between the tension discs, then through the hole at the top of the bar, and then down the back of the bar.
The bobbin has to be put in with the thread coming from the back.
The winder pivots on a large screw underneath.
To engage the winder against the balance wheel, just push it into place.
The winder is now ready to fill the bobbin. The little steel plate that rests against the bobbin will automatically release the bobbin winder once the bobbin is full.
If you want to take out the bobbin before the release mechanism is activated, just press gently on the steel plate.
Welcome to three new members today, Jaylee Miguel, Edsmum and Jessie Cunliffe. Thank you for joining!
Monday, March 4, 2013
German Bobbin Winders - No. 2
This is a Frister and Rossmann Transverse Shuttle machine - a slightly different model to the one I photographed when showing the first in the series of German bobbin winders.
This machine has a smaller balance wheel, a fancy spool pin and a different bobbin winder. The top of the bar is bent in a backwards curve at the top. The button for engaging the bobbin winder is at the bottom right.
Step 1 is the same. The thread has to pass between the tiny tension discs on the front inspection plate.
Next, the thread is taken over to the upright bar of the bobbin winder and through the hole at the top, passing from the top and then down the back of the bar.
The thread is passed down behind the bar and then brought out underneath it, reaching the bobbin from the back.
The metal plate beneath the bobbin has to be brought up into position so it is almost touching the bobbin. The plate is on a spring - press it down gently and it will spring itself up to the right position.
To engage the bobbin winder into position, so that the tyre touches the rim of the balance wheel, press this button...
... and push the bobbin winder back until the catch at the back holds the bobbin winder in place. This picture is taken from behind the machine looking down the back of the bobbin winder. The catch is at the bottom centre of the picture.
While the bobbin is being filled the metal plate will be gradually pushed downwards. If you want a full bobbin, wait until the plate automatically springs down away from the bobbin. If you want to stop sooner, press down gently on the plate...
... and the plate will spring down out of the way so you can remove your bobbin.
Wednesday, February 6, 2013
German Bobbin Winders - No. 1
This is my Frister and Rossmann Transverse Shuttle machine set up to wind a bobbin. This type of bobbin winder is seen on many German machines. It winds a perfectly tight, even bobbin of thread, and works better than any Singer bobbin winder. It is a very simple mechanism. This is how it works:-
First, take the thread through the miniature tension discs on the front inspection plate.
Not every machine with this type of bobbin winder has these tension discs, in which case either take the thread through the hook at the top of the face plate (top left in this photo), which is the first hook for the top thread, or through whichever other hook is provided there.
Next, take the thread to the top of the upright bar of the bobbin winder and thread it from the back to the front.
Put the bobbin in, securing the thread by trapping it between the end of the bobbin and the winder.
To engage the bobbin winder against the balance wheel, this machine has a lever at the bottom which is pushed up.
What happens next is pure magic. As you wind the bobbin, the thread passes over the curved edge of the plate on the bobbin winder, moving steadily and evenly from side to side.
When the thread reaches the other side and makes contact with the little pin at the end of the curved plate, it is gently nudged back and travels back the way it came. Pure genius.
When the bobbin is full it presses against the base of the upright lever, activates a spring, and automatically disengages the bobbin winder from contact against the balance wheel.
If you want to take the bobbin out earlier, just press the upright bar back gently with your finger and the bobbin winder will disengage.
Nifty, or what?
More German bobbin winders coming soon...
Friday, December 28, 2012
Adjusting the Bobbin Winder on the Singer 99K
This is my Singer 99K. Other models have the same bobbin winder, the Singer 66 and some class 15s.
Recently the tyre hasn't been making good contact with the wheel when I have been winding bobbins. I have been being lazy and just pressing it rather than walking across the room to get the screwdriver. I have finally fixed it today and it took me all of twelve seconds.
It is the big screw at the top left of the picture that needs to be loosened and the metal bracket it holds in place needs to be repositioned by a fraction. To find the right position, press the bobbin winder so that the tyre makes good contact with the wheel, then tighten the screw.
The irritating part of this job is that the screw is tucked into a fairly tight space, not giving an awful lot of room for your screwdriver to get at it. This shouldn't be too much of a problem if the screw isn't gummed up or jammed too tight.
If you can't get the screw to move, you can take off the belt guard, to which the bobbin winder is attached. To do this you take out the screw on the left in the picture above, and the whole component can be taken off. Once the adjustment screw is freed up, put the belt guard back on and make the adjustment with the bobbin winder in place.
It really is that simple.
Monday, November 12, 2012
Burning rubber
On old machines you frequently find that the rubber tyres on the bobbin winders are cracked and brittle with age. My 1927 Singer 99K was an exception. This is the state it was in when I got it. For some reason, don't ask me how, the tyre had melted, sticking to everything in its path. Some of it was sticking to the bobbin winder.
The rest of the rubber had dripped down to the bed of the machine below, settling into a horrible sticky blob, even running off to the right and gumming up the lid of the side compartment.
Fortunately cleaning it off wasn't as bad as I anticipated. I pulled off most of it with my fingernails. Now the machine has a new tyre, and there has been no lasting damage to the bobbin winder.
The last traces on the bed of the machine came off after I rubbed undiluted washing-up liquid over it. I am always a bit nervous of damaging the decals, so it is always best to try out on a tiny area first, but there was no harm done here.
Wednesday, September 26, 2012
Cleaning the Bobbin Winder - Before and After
This is the bobbin winder from Maria's Jones Family CS machine before I started attacking it with the metal polish. The easiest way to clean it was to unscrew it from the machine.
On close inspection you can see the black oily grime clinging around the screws. After scraping the worst off with a wooden cocktail stick, I used an interdental toothbrush to get the metal polish into all the awkward little corners.
After a good rubbing with cotton wool buds and a soft cotton cloth, the metal began to shine.
There are a few blemishes on the metal where the chrome has begun to lift, but considering the machine dates from about 1931, it is in very good condition.
To get all the rubbish out of the thread and the teeth which engage when the winder is in motion, I used a tiny bit of metal polish on an old toothbrush and rubbed it off with a cloth afterwards.
To clean the black japanned parts of the winder, I used a tiny drop of sewing machine oil on a dab of cotton wool.
Welcome to mdghall - thank you for following!
Wednesday, June 27, 2012
Welcome to the Lizzie Lenard Vintage Sewing Blog
...which will be all about vintage sewing machines and putting them to good use.
The Muvandfarve channel started out on Youtube with this video showing how to wind a bobbin and load the shuttle on a long bobbin machine. The bobbin winders are fascinating. When I was little my mum let me turn the handle for bobbin winding. The machine on this video was her machine, and the machine I learnt to sew on. It was manufactured in 1897, so it is already 115 years years old and still going strong. There is no reason why it shouldn't last another 115 years, and it is my sincere hope that there will still be plenty of people who know how to use these wonderful machines.
In fact, I'm on a mission...
PS. The Muvandfarve channel has now been renamed the Lizzie Lenard Channel. Farve is still indispensable when it comes to lighting, camera and editing, and he was totally unbothered at the suggestion that the channel should be renamed.
Subscribe to:
Posts (Atom)