Having prepared the collar, it is time to attach it to the bodice. This isn't a half hour job.
Before putting the collar on, the fold of the front overlap for the buttons and buttonholes has to be folded over inside out. The overlap needs to be double the width of the buttons. The buttons are half an inch wide, so the overlap is an inch. To add a layer of thickness I have inserted a strip of calico. The raw cut edge of the dress fabric is machine tacked in place down the side of the calico - I shall replace the machine tacking with machine stitching in a matching colour later.
The end of the collar needs to be placed an inch from the corner between the folded layers.
The pin is holding the collar in position.
Now the collar is pinned all the way round, to the outside of the bodice.
The pins need to be replaced with hand stitched tacking...
...and then the collar machine stitched round the neckline.
The raw edges have to be enclosed, so I have cut a bias strip from the dress fabric. It is one inch wide, with one edge folded under by a quarter of an inch. This crease has been ironed down, keeping the strip straight.
However, this strip is going to be sewn around a curve, so I make sure it is curved to fit. To do this, I dampen the folded edge with a few drops of water, pull that edge only, stretching it, and then iron the stretched edge while damp.
I do this a couple of inches at a time, working along the strip, until the whole strip holds a curve.
The strip of binding is now pinned and hand tacked along the neck edge.
The pins go in to show where the first line of machining is, so when I do the second line of machining it should end up directly next to the first line which attaches the collar.
The seam now has four layers of fabric, so to reduce bulk I have done some graded trimming.
I have used the tip of the iron to iron the seam towards the inside of the bodice, so that the binding can be pinned down ready for hand stitched tacking.
The last line of machining will be fairly easy to do if the binding has been ironed again once it has been tacked down by hand.
Now the two ends, which have been folded inside out, can be folded the right way round and pressed, and the two ends of the collar are an inch apart where the two sides of the bodice overlap.
The collar looks a bit untidy for the moment. It needs a good pressing.
Welcome to Pacobini, the latest follower - thank you for joining!
Linking up with Connie's blog Freemotion by the River for Linky Tuesday
The collar is made from two identical pieces cut from the pattern piece that I drafted. The two pieces are sewn together with right sides facing each other, with the stitching about a quarter of an inch from the edge. Then the seam allowance is trimmed down to about an eighth of an inch or a fraction over.
The easiest way to turn a curved seam the right way round is with the rounded end of a spoon handle.
Next comes a bit of fuss which is well worth the effort. It is nice for the actual join of the seam to disappear out of sight to the underneath of the edge of the collar. To do this I pin alongside the seam, pulling the join just into sight.
Then I iron down the seam, initially with the tip of the iron while the pins are still in place. Here is the ironed seam showing the underneath of the collar...
... and here is the upper side of the collar.
Once the collar has been ironed the neck edges of the upper and under collar no longer lie one on top of the other. There is no need to trim it, because the seam allowance will need to be graded once it is sewn.
To stabilise the seam at the edge of the collar I like to do edge stitching. To keep the stitching even and close to the edge, I use the adjustable cording foot and the seam guide.
The stitching stays parallel to the edge, even when going round curves.
Now it is time for the narrow rick rack. Again I am using the seam guide, and feeding the rick rack through the braiding foot.
Because the rick rack is woven on the bias it curves evenly.
Here is a close-up of the edge stitching and rick rack...
... and here is the completed collar, ready to be attached to the bodice.
Linking up with Connies blog Freemotion by the River for Linky Tuesday.
Here is the progress so far on Meg's dress - the two front bodice pieces have been joined to the back bodice with felled seams, and I need to draft a pattern piece so I can make a collar. The first step is to fold back the two front edges in the position they will be in when I make the buttonholes and attach the buttons. Then the bodice is laid flat on a piece of paper so I can draw around the neck edge and get an accurate outline.
The two front edges are going to overlap by an inch, and I need to allow a quarter of an inch seam allowance for when I sew the top and bottom collar pieces together. By marking three quarters of an inch from the folded edge I can be sure that I can position the collar an inch from the folded edge.
The drawing of the outline starts at the three quarters of an inch mark, and at the other end will finish the same distance from the opposite folded edge.
Once the outline of the neck is drawn on the paper, it is traced onto the paper that will be used for the pattern piece. I have used ordinary greaseproof paper.
At each end of the neckline I have drawn a short line at a right angle.
The next step is to draw the outer edge of the pattern piece by plotting dots two and a half inches from the neckline and joining them with a gentle curve.
To round off the corners of the collar I used the lens cap from my camera.
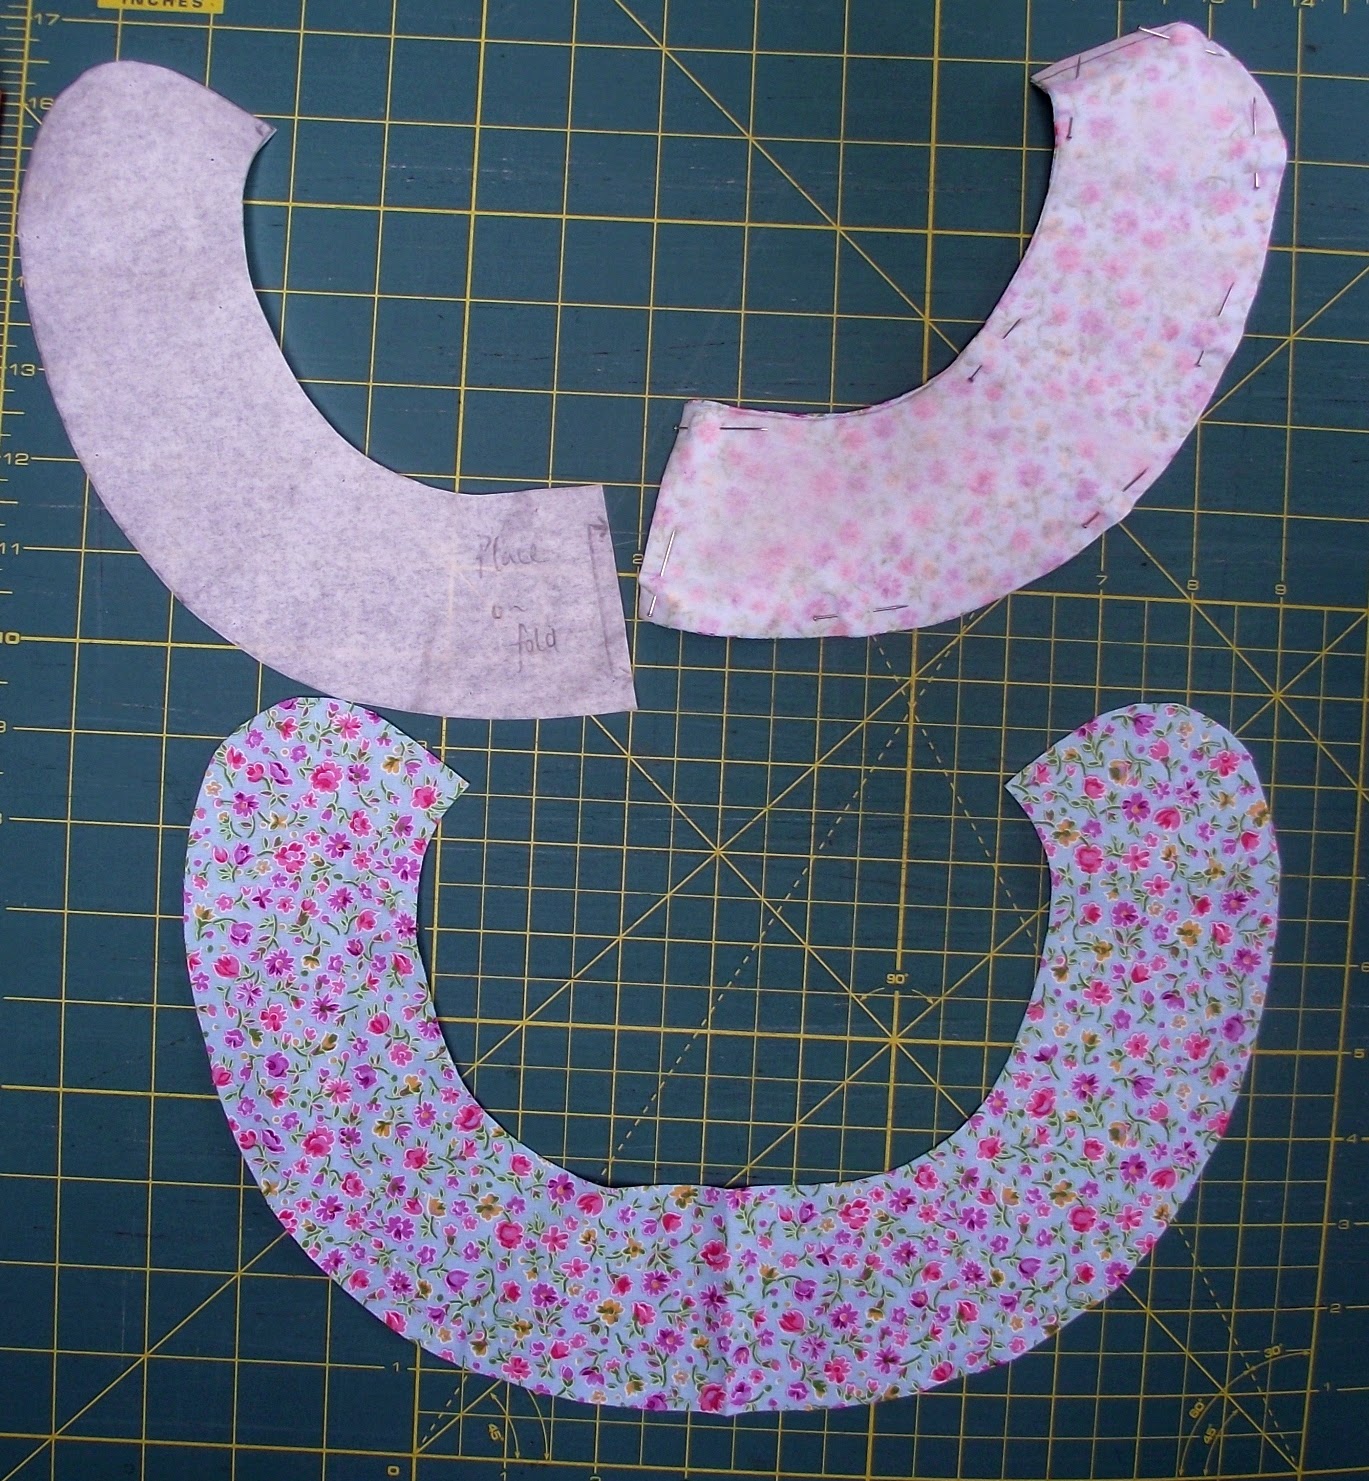
To make sure that the pattern piece is symmetrical, I have folded it in half before cutting it out.
Because I need to cut out two pieces for the collar, I cut the pattern piece in half and then cut out the two collar pieces by laying the centre back line of the collar on the fold of the fabric. Here are the two pieces cut out from the fabric, one already removed from the pattern piece and opened out, and the other still pinned to the pattern piece.
Linking up today with Kelly's blog My Quilt Infatuation for Needle and Thread Thursday.