Showing posts with label Buttonholers. Show all posts

Wednesday, February 18, 2015

How to Use the Mystery Buttonholer


A sample buttonhole which took only 30 seconds to stitch...


... using the wonderful mystery buttonholer, which I bought from a charity shop a couple of years ago.  


It has five cams (or are they half cams?), each marked with the size of button they are for, ranging from three to seven eighths of an inch, and including two cams for round ended buttonholes.  The other half is permanently set inside the buttonholer.

This marvellous gadget has turned out to be one of my best purchases ever.  It sews excellent buttonholes, it is easy to use, and I prefer it to my other vintage buttonholer, which is a Greist.  

Last year I posted a video showing the buttonholer in action.  In this post I shall show how to use it. 


This is the front of the buttonholer, showing the lever which fits over the screw of the needle clamp. When the needle moves up and down, so does the lever, thus operating the mechanism.  

At the centre of the photo is the hole for the fixing screw. 


The fixing screw attaches the buttonholer to the presser bar of the machine in place of the regular presser foot.


The red knob on the top overrides the lever mechanism.  When it is turned clockwise you can adjust the position of the parts shown below.


The prong protruding at the front remains static, whereas the metal piece underneath moves as the buttonhole is being sewn.  

In this photograph the lower piece is as far back as possible, and this is the position it needs to be in when inserting or removing a cam.


The cam fits into the back of the buttonholer.  You just push it in, and it clicks into place.


Once the cam is in, turn the red knob so that the lower part comes forward.  It has two arms, with little lugs on the side.


Now you can attach the rectangular plastic attachment...


... by fitting it over the little lugs.


Now it is time to get the machine ready.  This is my Singer 201K treadle.  I have lowered the feed dogs, removed the foot and its fixing screw, and threaded the machine top and bottom.


To attach the buttonholer to the machine, slide it into place from the back so that the end of the lever fits over the screw of the needle clamp...


... and then insert the fixing screw through to the presser bar and tighten it. 


The red knob needs to be turned again so that the plastic rectangle is pulled back as far as possible, as shown in this photo.

If you look at the reflections in the needle plate, you can see that the underneath of the plastic has rows of tiny sharp pyramid shapes, designed to grip the fabric.


The material is now in position, and the presser bar lever is down, ready for the buttonhole to be stitched.  I have brought the tails of the top and bottom threads forward so they don't get tangled up in the stitching.  Usually I just keep hold of them while I am stitching, but this time I made sure that the top thread was held down underneath the plastic rectangle because my hands weren't going to be free...


... because they were holding the camera!  

Watch how this wonderful contraption works - half a minute of pure magic.  The fabric is moved from side to side to give the zigzag stitch, and also backwards and forwards around the whole buttonhole.  I always go round twice to get a nice firm layer of stitching.

Making the video was a bit of a circus trick - feet treadling, both hands firmly holding the camera, and eyes watching the action through the camera.  It took three attempts.  On the first go I was holding the camera too low and the machine (or was it the buttonholer?) bumped it upwards with the first stitch.  The next time I tried I didn't press the shutter hard enough and didn't catch the beginning of the action.  Thrills and spills.


Finally, time to put the buttonholer away, and put this nifty metal tab to use.  First, make sure to turn the red knob to get the mechanism in the right position for removing the cam (see text in bold and photo above).  Also, make sure the tab is the right way up, with the little metal flap facing upwards.


Slide the tab into the back of the buttonholer under the cam...


... as far as it will go, and the little flap will click into a notch on the underneath of the cam...


... so you can pull it out.

The next bit of excitement will be to do samples of buttonholes with each cam, which will be very handy to refer to rather than doing a fresh test for every project.  Also, it will be great way of using this very photogenic cheerful turquoise cotton, which is otherwise useless because the dye runs like water. I am so glad I didn't chuck it out. 

Linking up with Connie's blog Freemotion by the River for Linky Tuesday

Monday, January 26, 2015

A Dress for Meg - 9 - Positioning the Buttons and Buttonholes


Finally, the last instalment showing the steps in making Meg's dress.  Here it is, finished, before I delivered it to her and she proudly tried it on for size.


The last thing to do before the hem was the buttons and buttonholes.  On this photo you can see how the gathers of the skirt are kept clear of the overlap.


To stiffen and strengthen the overlap I use a strip of calico, which fits snugly into the fold down the front edges.  The edge of the dress fabric is then folded about a quarter of an inch over the calico and machine stitched into place.


The seam attaching the skirt to the bodice has been constructed so that the raw edges are enclosed.  This gives a certain amount of bulk, which needs to be trimmed , as shown here. There are a few tacking stitches to hold the raw seam allowances together.


When the overlap is folded down and ironed the raw edges are hidden. 


The next step is to mark where the buttons are buttonholes are to be placed.  Because the buttons are five eighths of an inch wide, I have done a line of machine stitching, with the longest stitch length, five eighths of an inch from the folded edge.  This needs to be done down both sides of the dress so that both the buttons and the buttonholes are the same distance from the folded edge.


I started with the top buttonhole, placed at right angles to the edge.  To plot the position of the buttonhole, I pinned a button through one its holes so that the pin went through the line of stitching. This gave me the reference point for the buttonhole, the pin marking where the end of the inside of the buttonhole needed to be.

Then it was time to get busy with the buttonholer.


Here is the completed buttonhole on the finished dress.  The threads going through the right hand hole of the button correspond with the position of the pin in the previous photo.  


All the other buttonholes were stitched parallel to the edge.  Here is one of the buttonholes, shown before I had neatened the tail ends of thread.  The white machine stitching runs down the middle of the buttonhole. 


And here is the same buttonhole, with the white machine stitching removed and now all nicely fastened up, once the dress is completed.


Just to keep the overlap in place, after the buttonholes and buttons had all been done, I put in a few stitches by hand through the seam allowance at the bottom of the bodice.

Finally, I did the hem, gave the dress a good thorough ironing, and it was ready for Meg!

Welcome to Shannyn, the latest follower - thank you for joining! 

Linking up with Connie's blog Freemotion by the River for Linky Tuesday

Thursday, May 1, 2014

Buttonholes on Tweed


Today I got to grips with the tweed cushion that I am making for my husband.  I needed to cut the quilted panel to size and bind the edges, and then do five buttonholes.  It was a replay of last week when I did the buttonholes on the 1940s blouse - attaching the buttonholer to the 201K treadle and trying not to go crossed eyed at the blur in front of me as the work is swung rapidly side to side beneath the needle.


Here is the back.  I used quilting thread and went twice round the buttonhole to get a nice firm finish. If anything I think the buttonholes turned out better on the tweed than they did on the cotton for the blouse.

I always used to do my buttonholes by hand, which was very time consuming.  Now with the buttonholer how long does one buttonhole take?


About 30 seconds.  Total pleasure.

Linking up today with Kelly's blog My Quilt Infatuation for Needle and Thread Thursday 

Friday, March 28, 2014

Making a Dress Pattern from an Old Dress


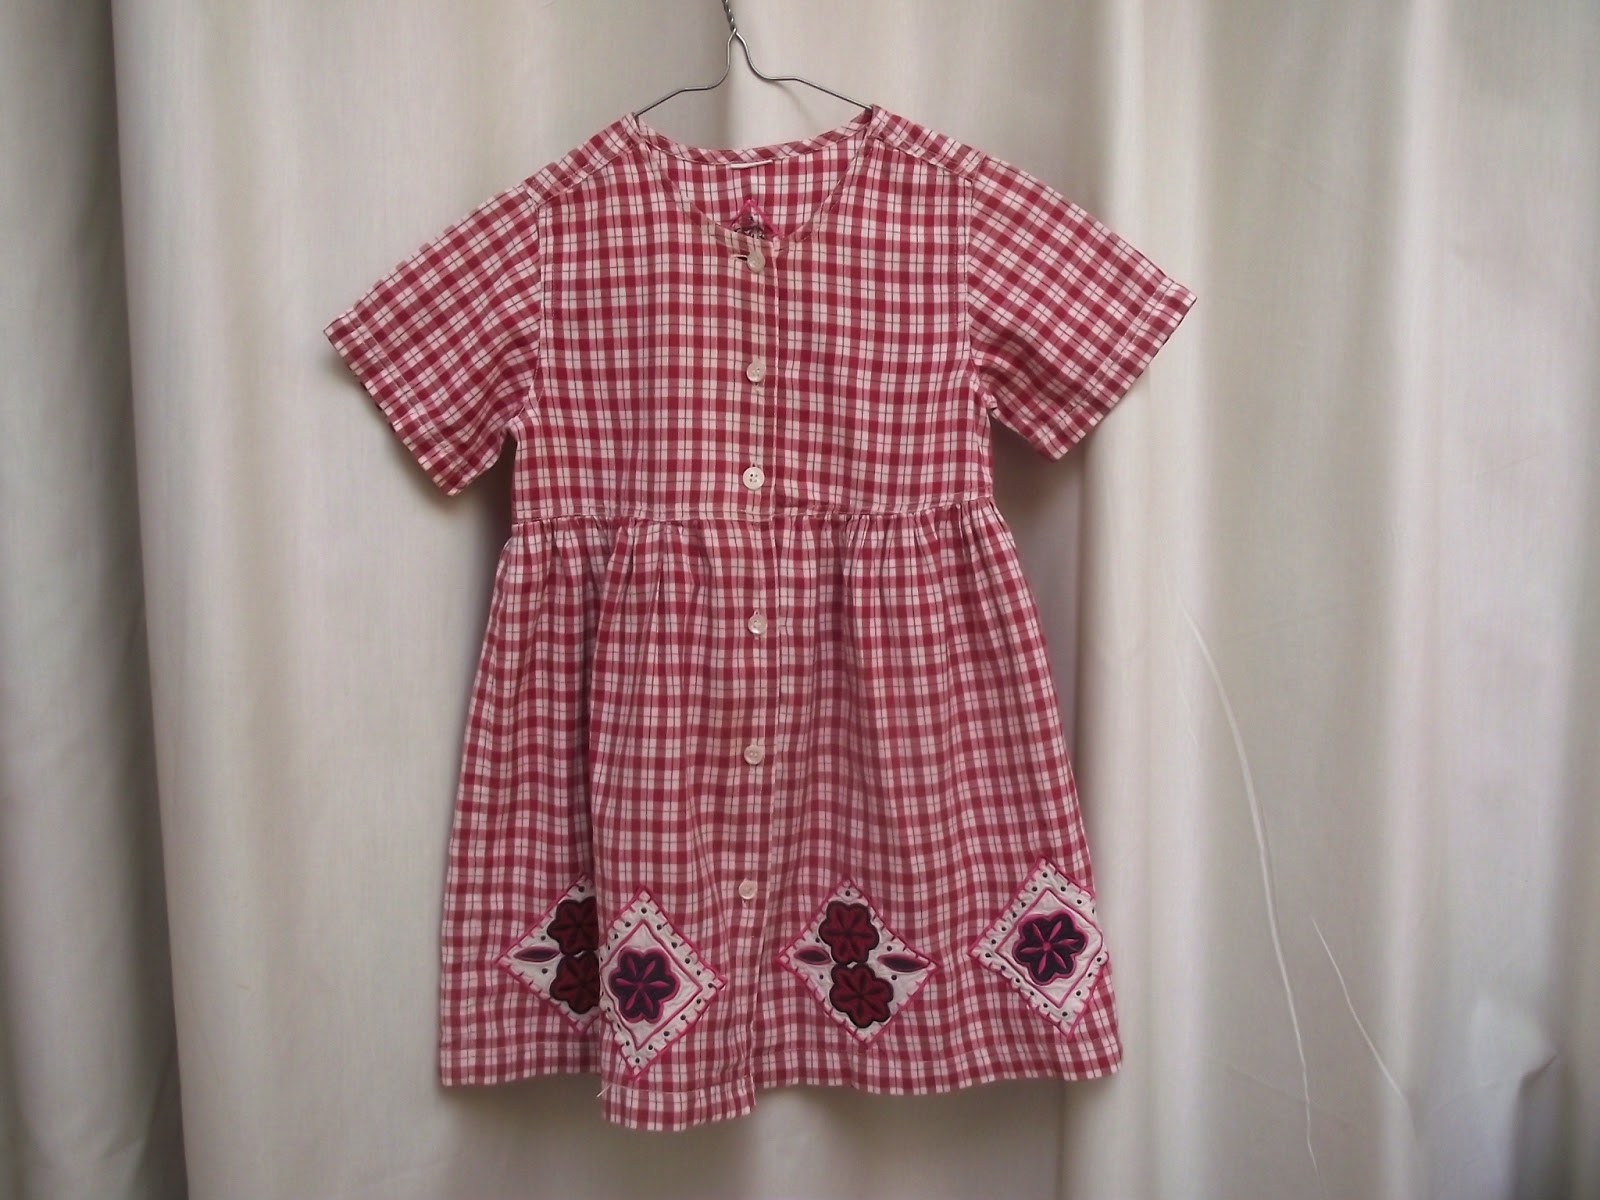
This little dress cost £2.50 from a charity shop, bought specially so I could cut it up.


It was in good enough condition to be used as a play dress because it wasn't actually falling apart. It had nice flat felled seams at the front of the shoulders,


and a bound neckline with a bit of staining - probably pasta sauce, a great favourite with toddlers.


About three weeks ago I got busy with the scissors and cut it up to make a pattern.


Here is the video showing the whole process.


And here is the finished dress made with the home-made pattern...


... complete with pretty trim around the sleeves...


... and neckline (note no pasta sauce yet)...


... and finally, the most exciting part of all, the first buttonholes I have made with the buttonholer

This has been a really enjoyable project from start to finish.  I used the 1949 Singer 15K hand machine for all the machine stitching, except for the buttonholes, where I used the Singer 201K treadle.

Now I can't wait to make the next little dress.

Linking up with Sarah's blog Confessions of a Fabric Addict for Whoop Whoop Friday
and Leanne's blog Devoted Quilter for TGIFF

and Barbara's blog Cat Patches for the March NewFO - meanwhile the February NewFO free motion landscape is proceeding at a far more leisurely pace...

Saturday, April 27, 2013

The Mystery Buttonholer


Here it is with its clothes back on.


It came in a plastic box (only slightly cracked),


along with all the extra bits and pieces.


I love these little half cams.

But it is still a bit of a mystery.  There is no clue as to who manufactured it or where.  I got in touch with Helen Howes because she has a similar buttonholer on her website - it's the one in the brown tin, which looks like an earlier version of mine.  She very kindly sent me a copy of the instructions. These confirmed what I suspected - no details of the manufacturer there either, otherwise Helen would have said who made it in the description of the item.  Also I was pleased to see that I had been getting everything right when I had been trying it out the night before.

Now I have to do some serious practising on some scrap material.  I haven't tried it out again since cleaning and oiling it.  Before I cleaned it the bight adjustment lever made no difference whatever position it was in, even though when I had the cover off I could see it was moving freely.  It all remains to be seen...

Thursday, April 25, 2013

Today's Mystery Attachment


It looks like a mousetrap with inbuilt instruments of torture - a miniature rack perhaps.

I spent yesterday evening working out how to use it.  It is from a charity shop, complete in its box with all the necessary parts, but no instructions.  I had to take off its plastic cover and see what was going on inside because it wasn't doing what it was supposed to.  The insides were gummed up with ancient oil.


It has spent the night with the sticky end in a jar of paraffin (our Transatlantic Friends call it kerosene).

The paraffin is a lovely shade of pink.

This morning I have cleaned off the residue, which was softened to a slimy consistency, and washed out the excess paraffin with washing up liquid and hot water.  After that it had a good rinse in clean water, a quick go with the hair drier, and now it is sitting on a radiator to dry it out thoroughly.

Next week I will be trying it out properly.  (Anything to put off all that hand sewing).

What is it?  

Big fat clue - my husband's first words to me today were "Good morning Mrs. Hutton-Bowler."


LinkWithin

Related Posts Plugin for WordPress, Blogger...