Showing posts with label Quilt As You Go. Show all posts

Thursday, September 29, 2016

Free Motion Mavericks - Week 108 - Colour on the Back


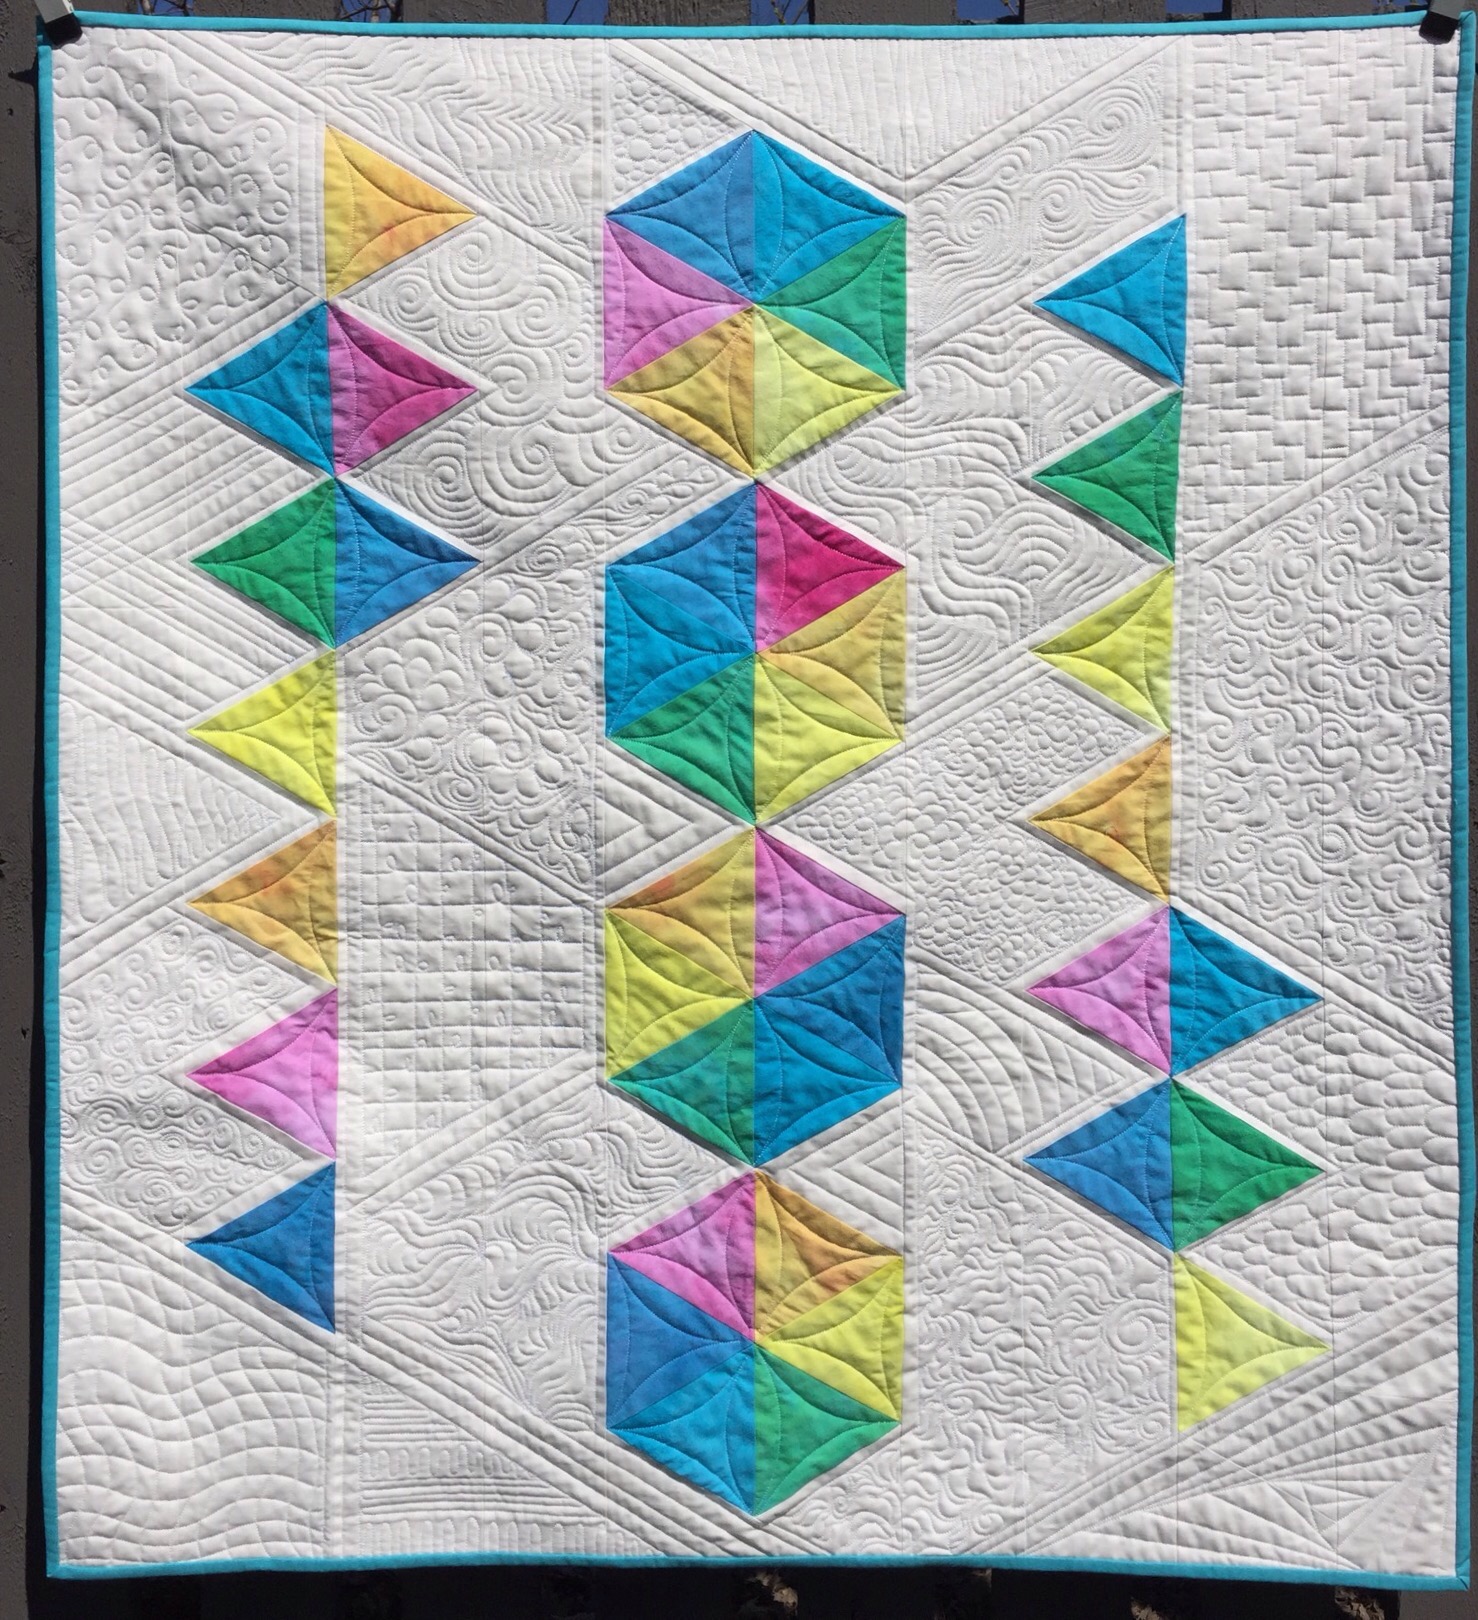
Green is probably the main colour on the back of the quilt I am piecing together at the moment.  I had to put up a more colourful picture this week.  The light isn't good enough for pictures of the front.  The neutrals would be all washed out.  With a bit of luck, it might be finished next week...

The piece at the bottom is the peacocks FMQ sample which features as the background for the linky button below - it is finally finding its way into a quilt!


blogbutton photo peacockfmq025_zpse5bceb10.jpg


Here goes for week 108...


The project in Week 107 that caught my eye was Lee Anna's colourful summer quilt.
Such a cheerful riot of colour and beautiful stitching!  If you haven't seen her blog post yet, nip over now and see more photos.


If you love free motion quilting, whether you are a beginner just taking the plunge, or you have reached the stage where you can do ostrich feathers with your eyes shut and still achieve perfect symmetry, then please link up.

Remember, FMQ is FMQ, whether your machine was made last week, or it is older than your granny.

Here are the very easy and slightly elastic rules:-

1.  Link up with any recent post, ideally from the last week but within the last month, which features a free motion quilting project, whether it is a work in progress or a finish.

2.  Link back to this post in your own post and/or grab the linky button for your blog's sidebar.
  
3.  Visit as many of the other participants as possible and say hello in the comments box.

4.  The link up will remain open for four days, from midnight to midnight GMT for the long weekend, Friday to Monday.


So far quilters from the USA, England, Wales, Australia, Canada, Germany, Holland, New Zealand, France, Macau, Russia and Ireland have taken part.  The first participant from each new country will get a special mention the following week.

Thursday, September 22, 2016

Free Motion Mavericks - Week 107 - Bit by Bit...


Still working on attaching the sample pieces, using my favourite Quilt As You Go method.  I am testing a slight change in the method, but need to attach a few more pieces before I can be sure it is consistently better. 


This latest piece I have joined has got a few artistic tucks.  Not ideal, but I'm not going to fret over them.  Sewing has had to take a slide down my list of priorities over the summer, but I am hoping to get back into the groove over the next month or so.


blogbutton photo peacockfmq025_zpse5bceb10.jpg


Here goes for week 107...


The project in Week 106 that caught my eye was Janice's shadow block mini quilt - full of loads of things that went wrong and even more that went right.  If you haven't seen her blog post yet, nip over now and see more photos.


If you love free motion quilting, whether you are a beginner just taking the plunge, or you have reached the stage where you can do ostrich feathers with your eyes shut and still achieve perfect symmetry, then please link up.

Remember, FMQ is FMQ, whether your machine was made last week, or it is older than your granny.

Here are the very easy and slightly elastic rules:-

1.  Link up with any recent post, ideally from the last week but within the last month, which features a free motion quilting project, whether it is a work in progress or a finish.

2.  Link back to this post in your own post and/or grab the linky button for your blog's sidebar.
  
3.  Visit as many of the other participants as possible and say hello in the comments box.

4.  The link up will remain open for four days, from midnight to midnight GMT for the long weekend, Friday to Monday.


So far quilters from the USA, England, Wales, Australia, Canada, Germany, Holland, New Zealand, France, Macau, Russia and Ireland have taken part.  The first participant from each new country will get a special mention the following week.

Thursday, September 15, 2016

Free Motion Mavericks - Week 106 - Turning Neutral


Unusually restrained colours - I don't usually go for neutrals, but when I laid out all my practice pieces out together last week I rather liked the effect, and now I have joined the first two pieces, I think this project might start growing on me.


The dinky pale brown check blends in really well.  It's a shame that I haven't got enough for the binding.  Or have I?  I shall find out soon enough.


blogbutton photo peacockfmq025_zpse5bceb10.jpg


Here goes for week 106...


The project in Week 105 that caught my eye was Olena's amazing magnolias.  The colours are beautiful, and the quilting adds so much interest in the background.  If you haven't seen her blog post yet, nip over now and see more photos.


curve pieced quilt


If you love free motion quilting, whether you are a beginner just taking the plunge, or you have reached the stage where you can do ostrich feathers with your eyes shut and still achieve perfect symmetry, then please link up.

Remember, FMQ is FMQ, whether your machine was made last week, or it is older than your granny.

Here are the very easy and slightly elastic rules:-

1.  Link up with any recent post, ideally from the last week but within the last month, which features a free motion quilting project, whether it is a work in progress or a finish.

2.  Link back to this post in your own post and/or grab the linky button for your blog's sidebar.
  
3.  Visit as many of the other participants as possible and say hello in the comments box.

4.  The link up will remain open for four days, from midnight to midnight GMT for the long weekend, Friday to Monday.


So far quilters from the USA, England, Wales, Australia, Canada, Germany, Holland, New Zealand, France, Macau, Russia and Ireland have taken part.  The first participant from each new country will get a special mention the following week.

Thursday, April 28, 2016

Free Motion Mavericks - Week 91 - Back to an Old Project


High time to use the experimental panels I quilted a couple of years ago - they have been lurking in the sewing room for far too long, so I have decided to join them together and make a small lap quilt.  This photo shows the panel with bindweed and leaves and berries, together with strips cut ready to use for the joining.  The patterned fabric in the foreground will be used on the back, and the front will probably just have plain colours. 

This is as far as I have got.  Sewing has ground to a bit of a halt recently, with so much going on in the family, and because I have been sorting out the allotment and planting spuds.  But I have made a start, after dallying for nearly two years, so I consider that progress!

blogbutton photo peacockfmq025_zpse5bceb10.jpg


Here goes for week 91...
 
The project in Week 90 that really caught my eye was Katy's beach ball quilt, packed full of wonderful FMQ in the white background. If you haven't seen her blog post yet, nip over now and see more photos, including two gorgeous baby pictures.


If you love free motion quilting, whether you are a beginner just taking the plunge, or you have reached the stage where you can do ostrich feathers with your eyes shut and still achieve perfect symmetry, then please link up.

Remember, FMQ is FMQ, whether your machine was made last week, or it is older than your granny.

Here are the very easy and slightly elastic rules:-

1.  Link up with any recent post, ideally from the last week but within the last month, which features a free motion quilting project, whether it is a work in progress or a finish.

2.  Link back to this post in your own post and/or grab the linky button for your blog's sidebar.
  
3.  Visit as many of the other participants as possible and say hello in the comments box.

4.  The link up will remain open for four days, from midnight to midnight GMT for the long weekend, Friday to Monday.

So far quilters from the USA, England, Wales, Australia, Canada, Germany, Holland, New Zealand, France, Macau and Russia have taken part.  The first participant from each new country will get a special mention the following week.


Linking up to Sarah's blog Confessions of a Fabric Addict for Whoop Whoop Friday.


Tuesday, March 1, 2016

Clothes Pegs


Ever versatile clothes pegs have come to my rescue in the past few days.  I have assembled a large quilt using the Quilt As You Go method, making full use of pegs when attaching large heavy sections.  I put pegs at the edge when doing the second line of stitching to the top binding, and for extra firmness put a line of curved safety pins a couple of inches in from the edge to keep the quilted panels from shifting.


Managing the weight of the work was then a whole lot easier when using the machine.


Later on, when all the panels were assembled and it was time to bind the quilt, I had about 24 feet of binding to contend with.  Rather than have the binding dragging along the floor, fraying and wrapping itself around my feet, which is what I usually do, I decided to be sensible and use a peg to make a neat bundle.  It was easy to keep the bundle on my lap and undo a couple of feet at a time as I needed it.

How ugly is that brown and cream stuff?  I can't believe I have finally used it.

Linking up to Connie's blog Freemotion by the River for Linky Tuesday

Friday, May 31, 2013

Quilt As You Go - Adapting Leah Day's Method


When it comes to joining quilted blocks, I use the method described by Leah Day on her excellent video, which you can find here if the video doesn't show up on this post:-

https://www.youtube.com/watch?v=v7_lwOfZWM8


Leah describes the method really well, and when I first saw this video I knew I had found the method I wanted to use.  There is just one snag - Leah recommends either a line of zigzagging or hand stitching for the last line of stitching.  I had to adapt the method so all the stitching could be done on straight stitch machines.  I also slightly changed the measurements.  Here is the method I came up with:-


I use strips measuring one and a half inches wide for the top binding, and two and five eighths of an inch for the back binding.  The seam guide is set to give a seam allowance of three eighths of an inch.  For the first line of stitching, I put the folded strip on the underneath and the top binding on the top of the quilted panel.  The machine I have been using is the 1949 Singer 15K hand machine, with the hinged regular foot attached.


Then I do the second line of stitching with the same foot and with the seam guide still in place.


Once these two lines of stitching have been done, I lay out the panels with the two edges together. With this project I usually find that there is a bit too much bulk for the edges to lie flat against each other.  This is because I have been using brushed cotton for the backing and polyester wadding - when I made the Queen's Diamond Jubilee Quilt I used cotton wadding and  standard weight quilting fabrics, so the edges lay flat first time.


Rather than trying to adjust the measurements, it is easier just to shave off a fraction from the seam allowance...


... and then it will lie flat.


Then the back binding can be folded down and pinned into place.  The pins need to go through the quilted panel, but not the binding on the right side.


When the work is turned over you will see the pins, and a new line of pins needs to be put in on the right side.  Once they are in place, the first line of pins has to come out.


Now the last line of stitching can go in.  For this the hinged cording foot is ideal because you can stitch right alongside the top binding.  This means that on the right side, the stitching will be barely noticeable...


... and on the back it holds down the binding just a fraction away from the folded edge.

I love this method.  It makes home quilting possible when you haven't got acres of space in the house.

Linking up again with Leah Day's blog for Free Motion Friday - visit her blog so you can see what other bloggers are making!


Friday, April 19, 2013

Assembling the Quilted Panels


Last month I pulled lots of pretty fat quarters out of the cupboard for some free motion quilting practice on the treadle.


Some panels went better than others.  This is the last one that I did and I was pleased that I managed it all in one line.


All the panels have now been cut into rectangles, then four different rectangles made into one larger panel.  Slowly I am joining all the panels with strips, and gradually putting the quilt together.  


Even the joining strips are from fat quarters.


Much as I hate patchwork prints, this one looks perfect used as a joining strip.

This quilted bedspread is going to look thoroughly girly.

And because it's Friday, it's time to link up again with Leah Day's Free Motion Quilting Blog

LinkWithin

Related Posts Plugin for WordPress, Blogger...