Showing posts with label Knitting. Show all posts

Thursday, February 18, 2021

Free Motion Mavericks - Week 319 - Two Projects Finished


A couple of finished projects to show this week, a cardigan and a little coat.  Both are knitted using the seamless method, which was my technical milestone for 2020.


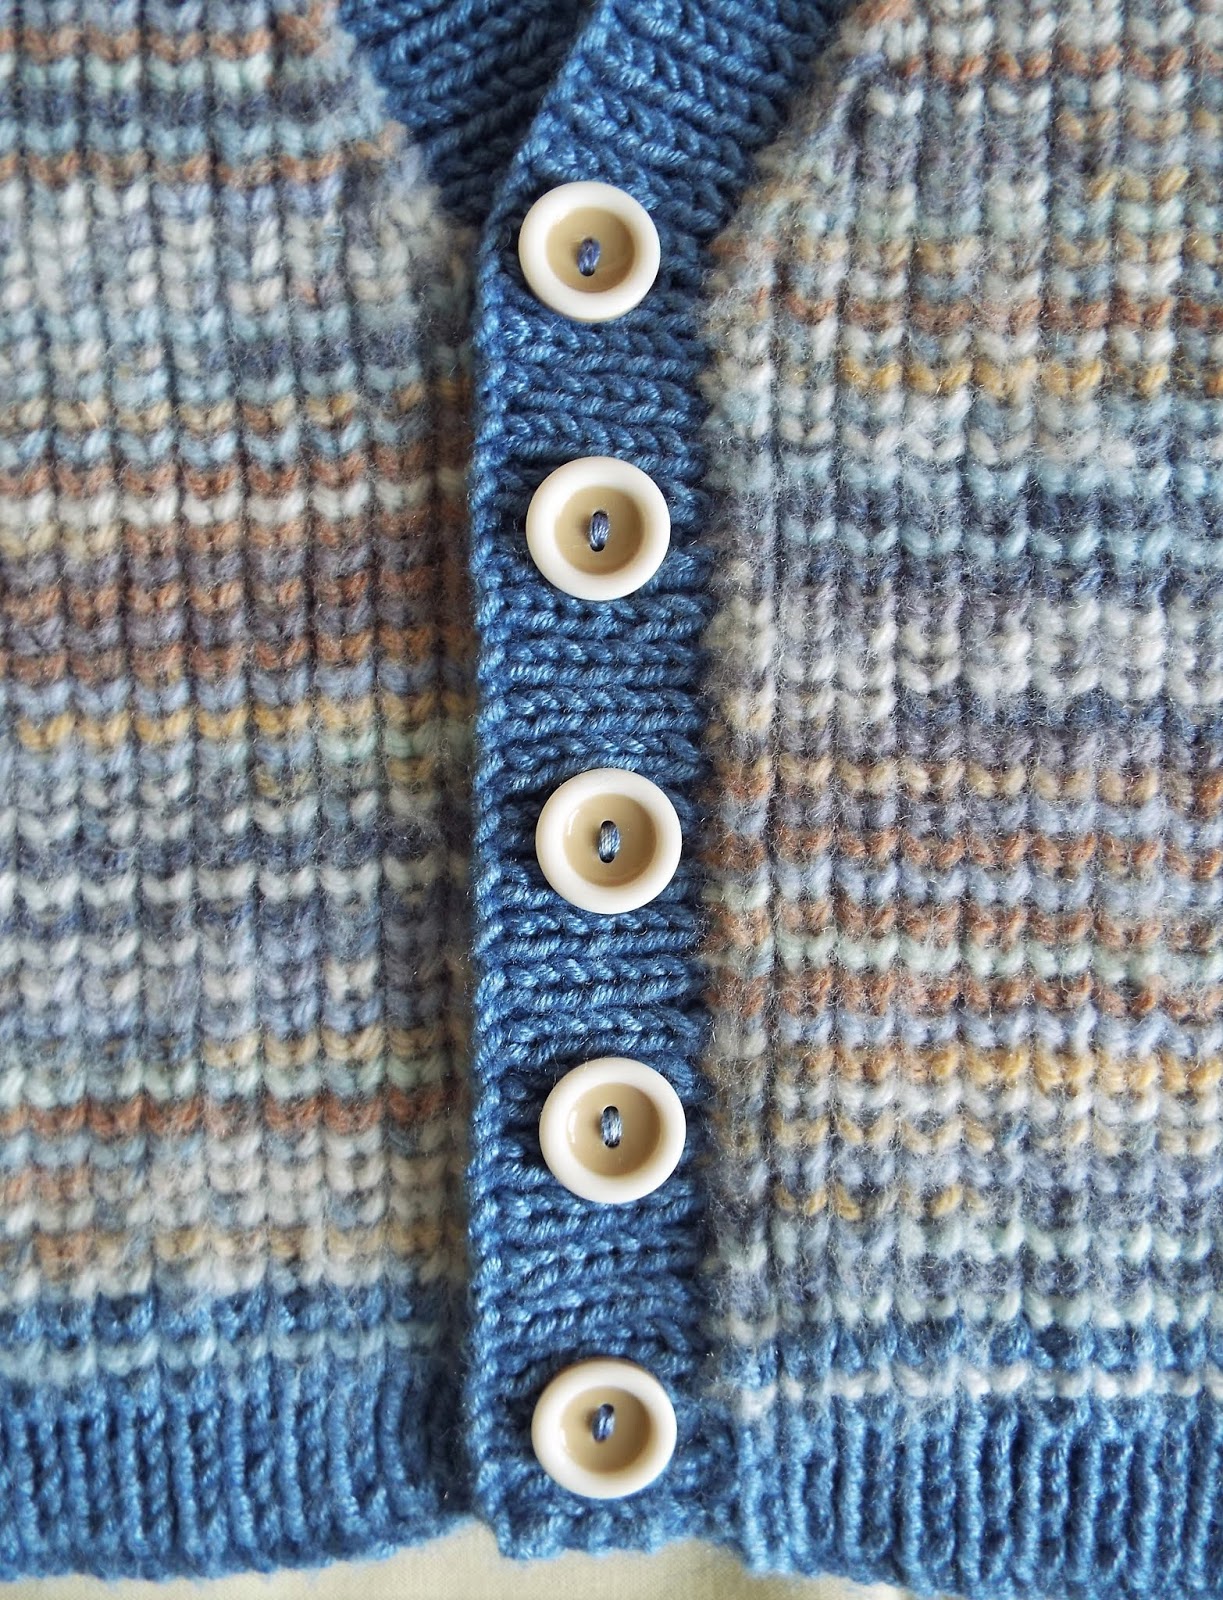
Firstly, this little cardigan.  I wasn't sure about this random yarn.  Before knitting it I thought the shades of pink, turquoise and yellow didn't go particularly well with each other.  If I hadn't alternated it with a grey and white yarn I'm sure I wouldn't have liked it at all.  Somehow the purple ribbing got it all under control (just the same as the binding pulls together all the colours in a quilt)...


... and the spotty buttons put the icing on the cake.


The little coat is a reworking of the pattern I am working on, and this time I got my maths right.


The cable didn't show up particularly well with the dark blue, probably because the fleck contrasts sharply with it, and the whole effect is a little busy, but I was pleased that I found exactly the shade of red that I wanted for the buttons.  There are eight all together - the top button is tucked out of sight when the collar is folded down...  


and there is a surprise button at the back of the collar, which can be undone to turn the collar up on cold days.

As for sewing, I have made a few more lavender bags, and shall probably carry on until I have used up all the lavender I have.  As for quilting, perhaps I need you all to give me a good telling off in the comments and give me a kick to make something.  Just anything, to get me started again.


Here goes for Week 319:-

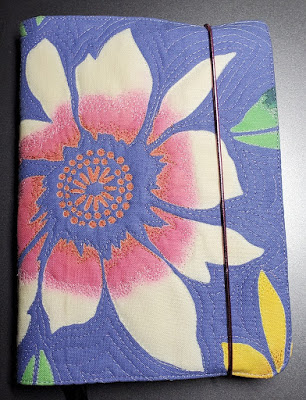
Many thanks to my co-host Andrée for linking up with her journal cover.  If you haven't seen her blog post yet, nip over now and see more.


If you have no free motion quilting to show, feel free to link up and show any project you like.  Here are the usual rules, but feel free to ignore them.  To keep the original emphasis, however, preference will be given to free motion quilting when featuring projects from the previous week.

If you love free motion quilting, whether you are a beginner just taking the plunge, or you have reached the stage where you can do ostrich feathers with your eyes shut and still achieve perfect symmetry, then please link up.

Remember, FMQ is FMQ, whether your machine was made last week, or it is older than your granny.

Here are the very easy and slightly elastic rules:-

1.  Link up with any recent post, ideally from the last week but within the last month, which features a free motion quilting project, whether it is a work in progress or a finish.

2.  Link back to this post in your own post.

3.  Visit as many of the other participants as possible and say hello in the comments box.

4.  The link up will remain open for five days, from midnight to midnight GMT for the long weekend, Friday to Tuesday.


So far quilters from the USA, England, Wales, Australia, Canada, Germany, Holland, New Zealand, France, Macau, Russia, Ireland, Brazil and Sweden have taken part.  The 
first participant from each new country will get a special mention the following week.


Friday, December 11, 2020

A Little Sleeve


Every project gives a bit of entertainment value.  Turning sleeves into towers is a bit of a novelty.  This is the second sleeve for a baby jacket.  The cable is a trick for keeping track of the rows.  Every time I twist the cable, I know that is a row where I need to increase for the sleeve shaping.  Just going round and round in the same direction takes some getting used to.  When I was knitting the first sleeve I made a mistake and ended up undoing about half an inch of knitting.  It took me hours.  It is just as well the satisfaction outweighs the frustration.

Saturday, October 3, 2020

Seamless Cardigan


Nearly finished!  Last week I was knitting on three needles, and this week I was using four.  Once the sleeves were on the same needle with the fronts and back, I found using a circular needle well nigh impossible because there was a tight corner to turn at each sleeve.  The only way I could do it was with four needles.  Once I was far enough up towards the neckline, the whole thing flattened out and I could get back onto two needles.  Seeing the whole cardigan hanging from the needles in one piece is very entertaining.  There is so little left to do now, just the button band.


And no seams!  Just a little hole under each sleeve, five stitches across, to be sewn up.


Wednesday, July 10, 2019

Two More Little Cardigans


Extra cute for a baby girl, this is the same size as the V neck version I made in blues and beige.  It travelled with us on our trip away, so all I had to do when we came home last week was cut off all the tails.


As always, I enjoyed seeing how the colours would turn out.  It will look great teamed up with dark pink or purple leggings.


I even managed to find buttons similar to those on the V neck cardigan, but in lavender and pink.


This cardy travelled with us too.  It is in the next size larger, and definitely in the right colours for a baby that is busy crawling and getting grubby on the floor.


I was worried that the bright orange, yellow and green random yarn would look a bit loud.  I'm sure the designer based the colours on fluorescent highlighters.  Once it was matched with a dark green fleck it toned down and started looking a bit drab.


Once these amazing moss green buttons were on, though, the whole colour scheme fell into place.

Finally I am ready to start posting the instructions for these cardies.  Stage 1 is going up this week!

If you want to get ready and start rummaging for wool, any soft yarn in a double knitting weight will be ideal. Three 50 gram balls should be enough.  The knitting needles are UK old size 10 / 3.25mm / US size 3.  For the long rows when I put all the pieces onto one needle for the raglan shaping, or for going round the V neck, I use two circular needles for the length. 

If you really want to play with colour, try combining one random yarn with a fleck.  The green cardigan is made with Sirdar Snuggly Rascal in Bean Bag and Sirdar Dapple in Enchanted Forest.

Or you can use two randoms and a fleck for the ribbing.  The baby girl's jacket above is made in Sirdar Snuggly Crofter in Maypole (the colours are a little more muted in real life than in the photo), Sirdar Snuggly Rascal in Playtime, and Stylecraft Batik DK in Violet.

Keen knitters beware - all these beautiful colours to experiment with are seriously addictive.

Friday, June 28, 2019

Holiday Stitching


Having tried bamboo needles and hated them, I had to find a way to take my knitting on holiday without having to worry about knitting needles.  So here is the latest little baby jacket, all finished except for the seams.  If my bodkin is picked up on the X ray machine at the airport it won't be too much of a tragedy.  If, however, I were to have a pair of metal knitting needles confiscated, especially with knitting on them, then I fear there would be an international incident.

I couldn't resist sewing the buttons on in advance.  When I sew this little jacket up it will seem like a magically quick finish. 

Saturday, June 22, 2019

Increasing Stitches in Fisherman's Rib


When increasing stitches when knitting in fisherman's rib, this is the method I like best.

The increases are made on a right side row, where the knit stitches are worked in the usual way, and all the purl stitches are slipped, with the yarn at the front of the work.

When increasing at the beginning of a row, to keep the edges neat, the first stitch is slipped, the second stitch is a knit stitch, and then the increase is made.  The yarn that stretches between the second and third stitches is picked up...


… and in this picture can be seen on the right hand needle...


… then the left hand needle is passed through the front of the picked up stitch, and it is worked as a knit stitch through the back of the stitch.


Here you can see the increased stitch on the right hand needle.


Now the yarn is brought forward and the next stitch is slipped purlwise to continue the rest of the row.


To increase at the end of the row, when three stitches remain, bring the yarn forward and slip the purl stitch.


Next, the yarn between the stitches is picked up, and the increase made in the same way as shown at the beginning of the row.

Then the last two stitches are both knitted.

With the extra stitch at each end of the row, this means that there are two knit stitches side by side on a right side row, and two purl stiches on a wrong side row, until the next increase needs to be made.


The next time it is straightforward.  The yarn between the two knit stitches is picked up in exactly the same way as shown above, and knitted through the back of the stitch.


On the next row the new stitch means that fisherman's rib can be worked as normal.

Saturday, June 15, 2019

Tweedy Blue Baby Boy Cardigan

Really dinky, this one.  This is the smallest size cardigan that I am making for my forthcoming pattern.  It is two sizes smaller than the toddler grandad cardy that I finished a few weeks ago.


Apart from the plain blue for the rib, I used two random yarns: one, a combination of blues and cream, and the other, navy, pale blue and white with a little bit of brown.


With the cardigan being so tiny, there was only just room for five buttons down the front.  These cream and beige buttons were the perfect match.  For some reason I didn't spot them until I had been through the button rack about five times.  I hope I'm not losing my knack!


Sunday, May 26, 2019

Slipping Stitches for Neat Edges


All keen knitters have their preferred way of sewing up the seams.  This is the method I shall be recommending in the pattern I shall be posting soon.

Fisherman's rib, because it gives a slightly compressed effect, needing more rows per inch than stocking stitch, calls for slipped stitches at the beginning of each row. 

The little cardigans I have been making have all involved playing with colour, alternating two-row stripes, so these instructions include showing how to change yarn from one colour to the other.

In brief, the last stitch of every row is a knit stitch, and the first stitch of every row is slipped knitwise.


This is the back of the work, and the row where I change colour, in this case from orange to green.

First, insert the needle as if to knit the first stitch.


However, the stitch isn't worked, it is just slipped onto the right hand needle.

The orange yarn is taken round to the back of the stitch, and brought round to the front between the needles, and held in place to the left.  


Then the green yarn is picked up to work the next stitch, which is a purl...


… and the rest of the row is worked in green.  This is a knit one, purl one row, with the last stitch being a knit.


On the next  row, slip the first stitch, and keep the yarn at the back of the work ready to knit the next stitch.

This row is the row where the purl stitches are slipped and the yarn carried over the needle.  The last two stitches of the row are both knit stitches.


This is the edge of the work, seen from the back.  Just inside the edge you can see the two-colour rope effect where the yarns are overlapped (as in the third picture) when changing colour.  Also, the actual edge is consistent with the compressed tension of the fisherman's rib, making it easy to sew the seams and pick up stitches for the button band.  


xxx

Sunday, May 19, 2019

Toddler Grandad Cardigan


Putting brown and green granddaddy colours together for a baby boy's cardigan has been very entertaining.  One minute you might be thinking the whole effect will be post-war drabness, the next minute you are in fits of giggles imagining a toddler at an agricultural show getting excited at seeing the lambs.  It is definitely the country boy look.

After making the pink V necked cardigan and getting into a slight mess by misplacing the shaping for the neck, this time I decided not to wing it, and plan in advance.   


All went according to plan, and the shaping worked so that I ran out of stitches on the two front pieces when the neck was the right width.


On the back I needed to carry on the raglan shaping through the neck band until casting off.


Old fashioned buttons complete the look.

Now I am ready for either a boy or a girl, with the next baby in the family due next week!

Also, I am well on the way to writing up my first knitting pattern for babies' cardigans, in three sizes, with options for round or V necks.  I just have to finish knitting all six cardies first.

Saturday, April 27, 2019

Fisherman's Rib


The last few knitted projects I have finished recently have all been in fisherman's rib.  I absolutely love the texture, and the effect when alternating stripes of two different random yarns is very pleasing.  It keeps me enthralled until well after midnight, and with two nieces having babies within a few weeks of each other this spring, I have been churning out little cardigans at a rate of knots.

I shall soon be ready to post instructions for the cardigan, but before doing so, here are the instructions for the stitch.  There is more than one method, but this is the method I prefer.

The first picture shows the back of the work.  Essentially, it is knit one purl one rib, but with a slight difference.  There is nothing unusual about the purl stitches.


However, for the knit stitches, the needle is not only put through the stitch, but also the yarn that was carried over the needle on the previous row.


On the next row, the knit stitches are worked in the normal way, and the yarn brought forward as if ready to work the next stitch as a purl.


The stitch is not actually worked, it is just slipped from the left to the right hand needle.


Then the next knit stitch is worked.  Because the yarn has been left at the front of the work, it has to be carried over the needle, and over the slipped purl stitch, to go round the back to make the knit stitch.  This row is very quick to knit, because half the stitches aren't being worked, just slipped.

If you have never tried this stitch before, knit a little sample square.  It is really quite easy.

Saturday, April 13, 2019

A Little Cardigan Taking Shape


Edging towards the finish, with just the ribbing down both sides of the front and around the neck left to knit.  This time the shoulder shaping went smoothly, unlike last time, when I spent hours unravelling and reknitting the neckline of the green and orange cardy.  I think my husband got a little bit fed up of hearing about it, and told me quite emphatically that I needed to write down what I was doing.  Like a good girl I have been doing as I have been told, and taking lots of photographs too.  

After Easter I should be able to post the entire pattern, so if anybody is keen to get started, hunt out some double knitting baby yarn and size 10/3¼mm knitting needles and be ready to go!

Wednesday, March 27, 2019

Green and Orange Cardigan for a Baby


One of my most frustrating knitting projects ever, so I am delighted it is all over and done with.

This is the round neck version of the Little Miss Marple cardigan that I finished last month.    I have used the same salmon pink yarn for the ribbing, but this time it looks overwhelmingly orange because that is the colour that predominates around the neck.

The main part of the cardigan is in fisherman's rib, knitted in two random yarns in two-row stripes - a neutral yarn in shades of white, cream and pale grey, alternating with a pastel shaded yarn in a variety of shades of green, blue, grey, yellow and pink. 


I love the finished effect of the shaded stripes.

What I didn't love was the amount of undoing and re-knitting I had to do.  It was all entirely my own fault, but that is half the fun of not using a pattern.  I thought I was making it exactly the same as the previous cardigan, but just changing the neckline, but for some reason I seemed to end up with more stitches at the top of the sleeves.


I started the shaping for the neckline too soon, and ended up unravelling about a dozen rows and doing it again.

Once I had done that I managed to get the decreasing for the raglan on the front left hand side shifted over a stitch out of place.  Served me right for getting too interested in the video I was watching.  I had to drop the stitches down several rows and pick them up with the decreasing in the right place - no mean feat when dealing with fisherman's rib.  It took almost an hour.

The next error was having too many stitches on the collar when it came to casting off.  It didn't lie flat.  This time I undid about six rows, and resolved the problem by carrying on the raglan shaping into the collar.
 

Eventually I worked out why I had kept getting things wrong.  Fisherman's rib compresses the knitting, meaning you need more rows per inch for the number of stitches than for straightforward stocking stitch.  This is why the line of decreasing at the shoulders runs at a 45 degree angle, giving a right angled yoke effect when a band of colour is worked across the chest.  I am more used to stitches that give a wider angle, so I was slightly thrown with the shaping for the shoulders and neck.

Despite the frustration, I was pleased with the result.  So much so that I decided to make another.


I have already started.

This time, however, I shall keep a record of what I am doing.

If I blog it, is anyone up for a knit along?

LinkWithin

Related Posts Plugin for WordPress, Blogger...